This Low FODMAP Sourdough Pizza joins our collection of pizza recipes, which range from super-simple, to Wood-Fired Neapolitan-Style and several in-between. You can read more in Everything You Need To Know About Low FODMAP Pizza. This recipe begins with a Sourdough Starter, which we teach you to make in that recipe, and then the recipe for the sourdough pizza itself is here below.

Do Your Homework
To get the most out of any of our pizza recipes, please first read our articles Low FODMAP Pizza Equipment & Ingredients as well as Everything You Need To Know About Low FODMAP Pizza before you begin.
Since we assume you are interested in fermentation, also take a look at our 72-Hour Ferment Low FODMAP Pizza recipe as well as our Wood-Fired Neapolitan-Style Low FODMAP Pizza.
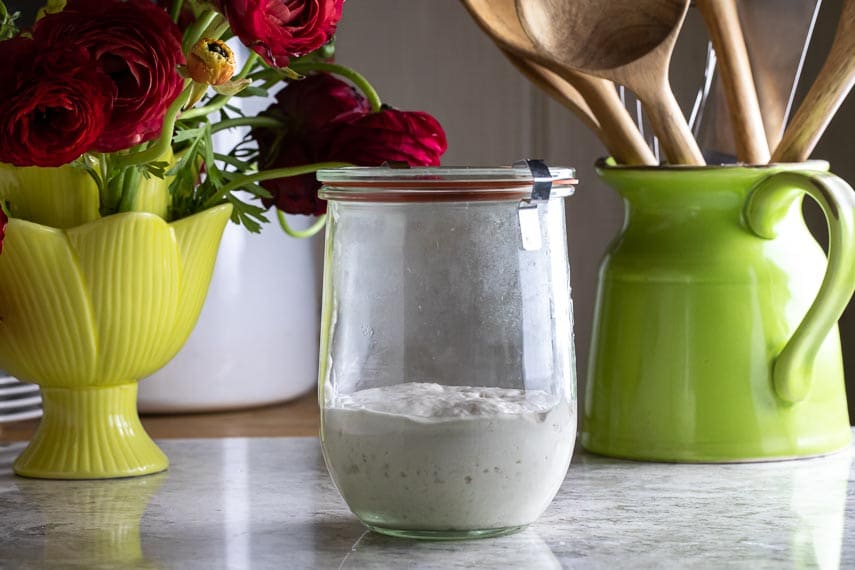
Begin With Starter
You do have to first make, or have on hand, a sourdough starter. Please click over to our Low FODMAP Sourdough Starter recipe to make the one we use.
Is This Sourdough Pizza Gluten-Free?
No, it is not. It is lower in fructans, and therefore low(er) in FODMAPs. Exactly how much lower in FODMAPs no one knows, since this has not been lab tested. In any case, each batch and every starter is likely to yield different fructans reduction levels.
The low FODMAP diet is low FODMAP, not no FODMAP, and it is not a gluten-free diet.
Please review these articles:
- How Fermentation Affects the FODMAP content in Sourdough Bread & Dairy Foods
- The Low FODMAP Diet Is Not A Gluten Free Diet
- Ask The Right Question: Is This Low FODMAP vs. Can I Tolerate This?
- And check out this study, which explains the relationship between sourdough culture and fructans.
A March 2021 article in The International Journal of Food Sciences and Nutrition titled “Reducing FODMAPs and improving bread quality using type II sourdough with selected starter cultures” explains some current research.
Four breads were lab tested. Three breads made with white wheat flour and sourdough culture had an average reduction of fructans by 72%, with one reduced greater than 92%. The fourth bread made with yeast had a fructan reduction of about 20%, however, the fermentation time was maxed out at 6 hours for all of them.
What is the takeaway? That using sourdough culture yields a bread with lower fructans. That bread made with yeast also has lowered fructans. We do not know what the fructan reduction would be with a longer fermentation time, but there is an indication that it would lessen the fructans level even further.
We also know from lab testing that sourdough breads that have the addition of yeast and a short 2-hour rise time can be low FODMAP. So the final conclusion, that Monash agrees with, is that you can never know the fructan content for sure without lab testing.
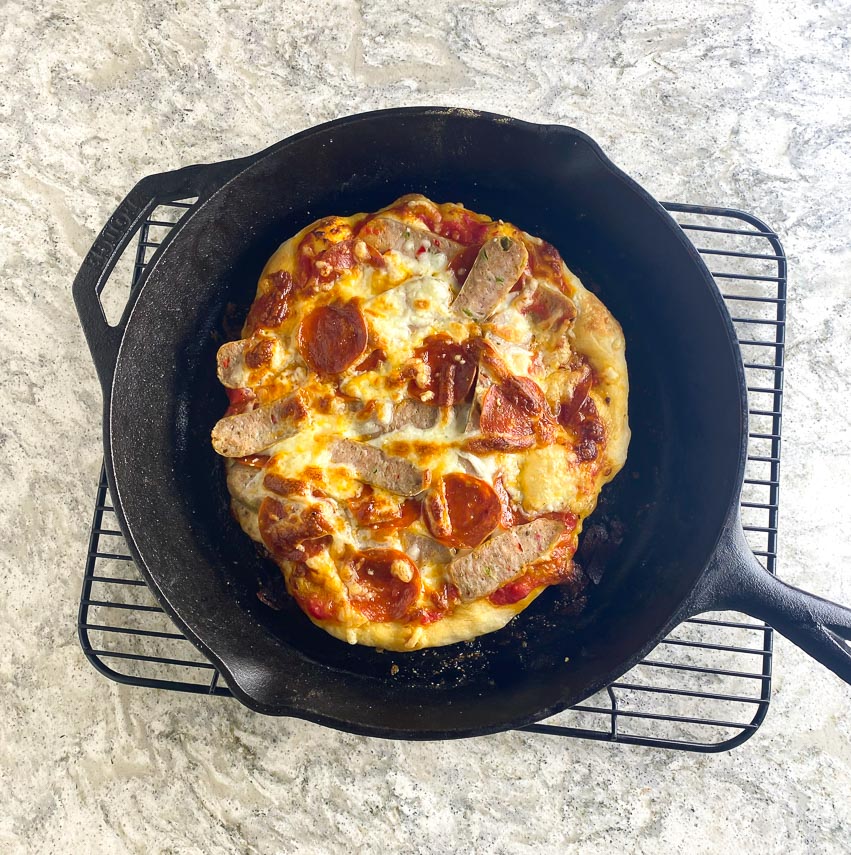
Yes – a 12-inch (30.5 cm) cast-iron skillet. Read on.
If you haven’t figured out by now, we love pizza. We love it every which way and we have brought you several recipes from which to choose. Some recipes require special equipment, and some don’t.
When it comes to baking in your home oven, we have recipes that utilize basic sheet pans, pizza stones as well as 3/8-inch thick baking steels. And then this one that uses a cast-iron skillet.
There is nothing specific about matching our sourdough pizza with a skillet, it is just that we wanted to show you how to make pizza in a skillet as as well as other approaches, and this sourdough and the skillet make a good match.
If you want to try our 72-Hour Ferment Pizza in a skillet, you certainly can.
This recipe makes four pizzas and with one skillet you will have to bake them in succession. If you have two skillets, you can do two at a time, but more than that and we do not think they bake as well.
Define best? For our Neapolitan-Style Pizza we would never use anything other than fresh, high-moisture mozzarella, either buffalo milk or fior di latte. For this pizza we use low-moisture supermarket mozzarella, but whether you use whole milk or part skim is up to you. We just do not recommend low fat.
Low Moisture mozzarella is the cheese you find in the supermarket dairy case and can be whole milk or part skim. (It can also be low fat, but we do not recommend that kind for our pizza recipes ). Low moisture mozzarella is sold in blocks, sticks and shredded (don’t buy shredded; more on that below).
Low moisture mozzarella is aged, denser, saltier and has a longer shelf-life than fresh mozzarella.
Fresh mozzarella, which is often packed in water, whey or brine, can contain as much as 60% water, or higher for artisanal cheeses. It is creamier and softer than low-moisture mozzarella.
The FDA makes things a little confusing. While both whole milk and part-skim mozzarella are both low moisture, they will not always be labeled as such. If a mozzarella has between 45% and 52% moisture, there must be the term “low moisture” on the label. However, those with 52% moisture and above can just be called “mozzarella”. This explains why some brands differ from others in their label terminology.
So, how do you choose?
Whole Milk Mozzarella: This version is the richest and melts beautifully. It can, however, sometimes break and create a bit of an oily layer. Some folks love that; others do not. The fat content can range with the higher end being about 48% fat. We love Polly-O Whole Milk Mozzarella Cheese.
Part-Skim Mozzarella: There are devotees who prefer part-skim. It browns better than the whole milk version, which some pizza makers love. The fat content is lower than 45%. Try Sorrento Part Skim Mozzarella.
A Note About Pre-Shredded Mozzarella
Buying pre-shredded cheese seems like a good idea, right? Saves time and effort. But the problem is that pre-shredded cheeses have additives to keep the cheese shreds from sticking to one another. Cellulose, which is low FODMAP, is often used, but it adds a dry, powdery texture to the cheese, which actually keeps it from melting well. We do not recommend pre-shredded for our pizzas.
Plan Ahead
As with any recipe, we implore you to read the entire recipe through first. If you do not have a sourdough starter on hand, you are at least one-week away from making this pizza.
Please click over to our Low FODMAP Sourdough Starter now!
Once your sourdough starter is ready to use, you are still a couple of days away from enjoying your pizza.
Sourdough Pizza Schedule
Let’s break it down. It really is easy as 1-2-3.
1. Begin 24 hours before you want to eat your pizza. Want pizza Friday night? Start Thursday evening. You will make your pizza dough, using your sourdough starter, cover it well, work it at the 30 minute to 1-hour mark, then let it bulk ferment at room-temperature for about 12 hours or overnight.
2. At the 12-hour mark you will divide it into balls; directions below. After that you will refrigerate the dough, well covered, for up to 36 hours but it can be as short as 6 hours.
3. Remove dough from refrigerator 2 hours before prepping your pizza; details below. Make your low FODMAP sourdough pizza!
Let’s Talk Low FODMAP Pizza Toppings
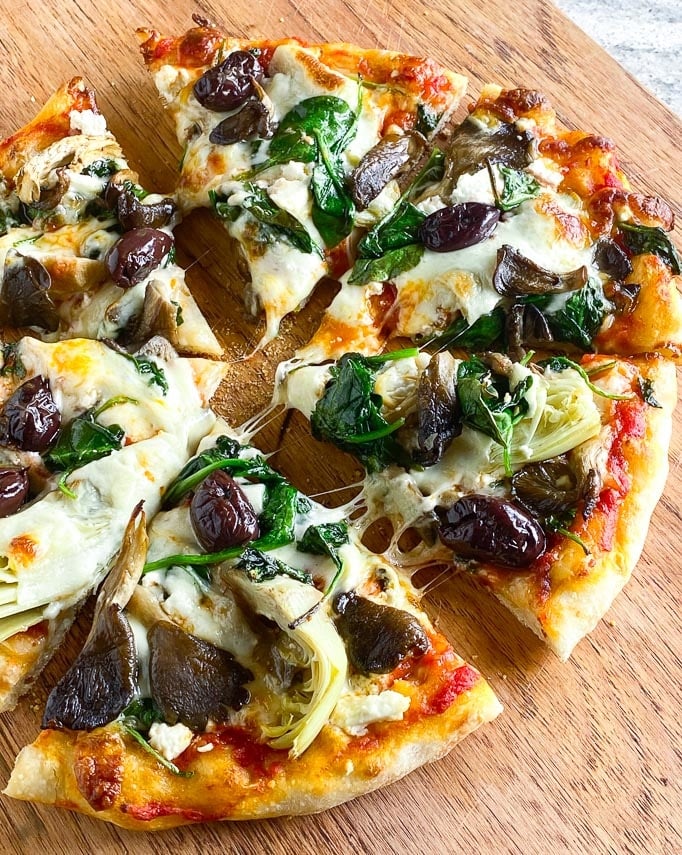
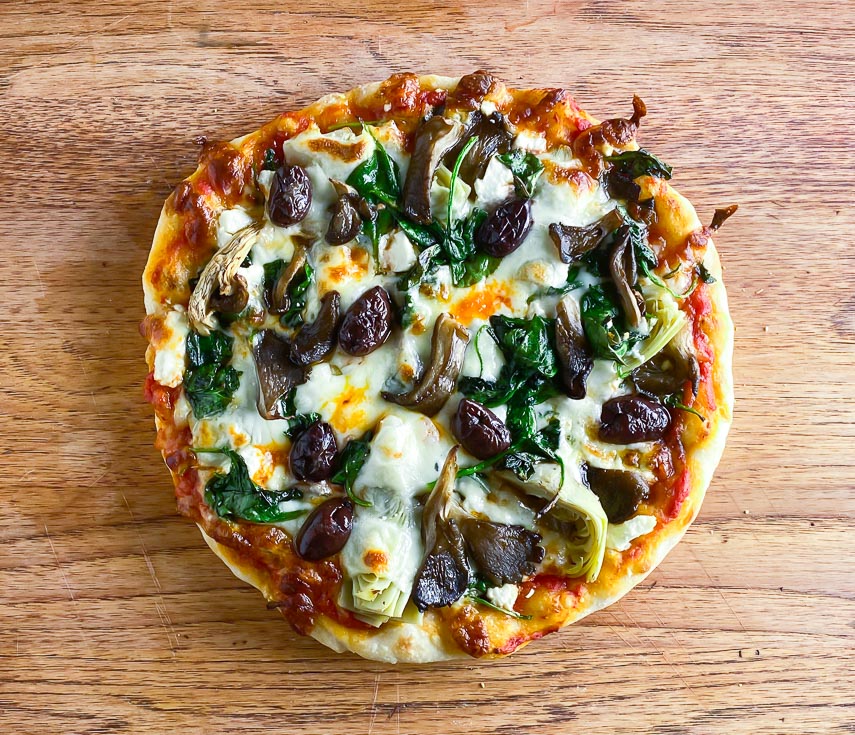
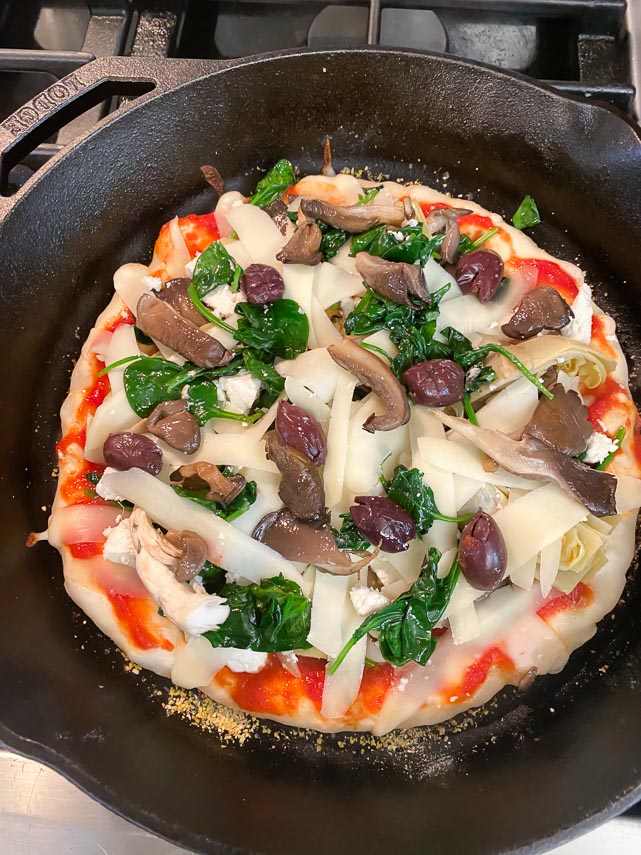
Our article Everything You Need To Know About Low FODMAP Pizza delves into low FODMAP toppings in more depth, so be sure to read that section. For this Low FODMAP Sourdough Pizza I chose to make one heavy on vegetables, and another heavy on sausage and pepperoni!
Watch your stacking and have fun topping your pizzas to your liking.
How To Make Low FODMAP Sourdough Pizza
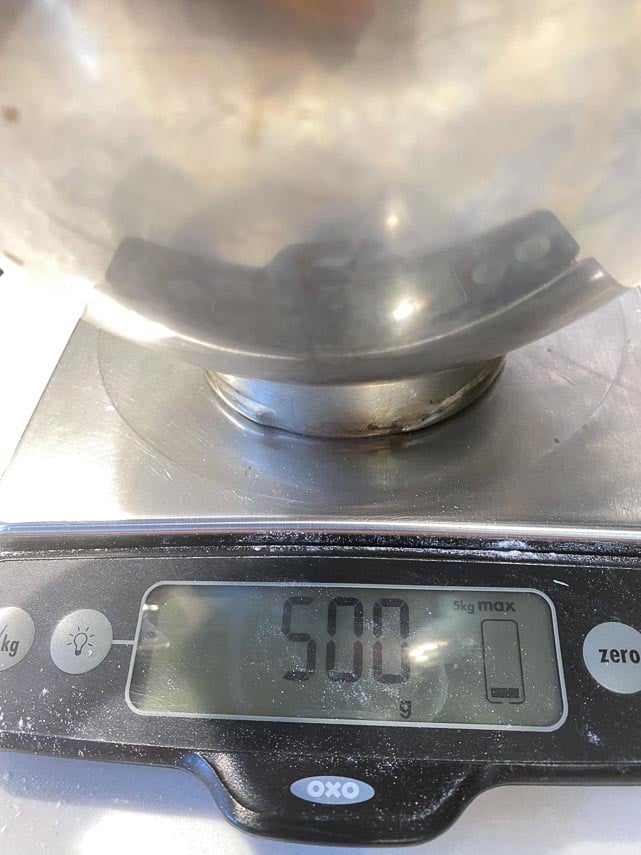
24-hours Before Serving – For Making By Hand: In a large mixing bowl sttir the warm water and salt together until salt dissolves. Stir in the sourdough starter and olive oil, then add the 500 g of flour using a combination of stirring and folding until all ingredients are combined well.
At first the mixture will look shaggy.
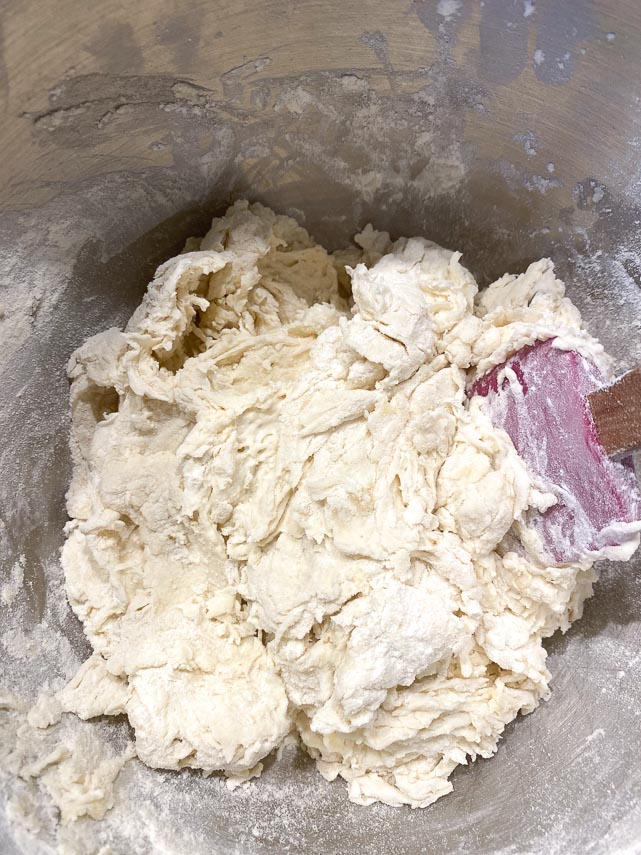
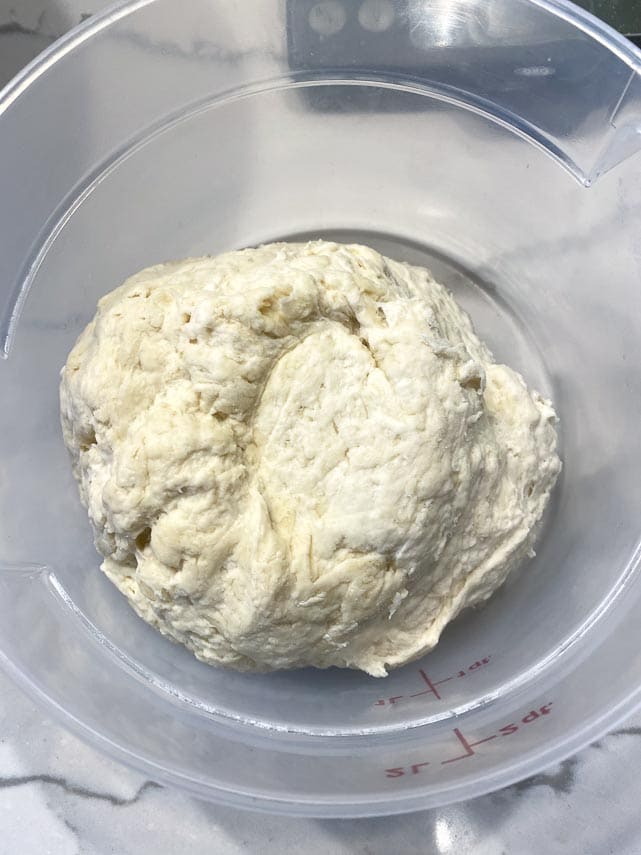
At that point use your hands to work the dough and knead it enough for the dough to come together into a moist, springy ball.
You can also do this with a stand mixer and those directions are below.
Whichever way you prepare the dough, scrape it into a clean container with room for expansion, cover it well and allow to sit at room temperature for 30 minutes to 1 hour (whatever works for your schedule).
Use your hands to bring the bottom of the dough up and over the top, gently stretching as you go. (I moisten my hands a bit to minimize sticking). Turn the container and repeat the stretch and fold action several times. I usually do about 4 to 6 stretch/folds.
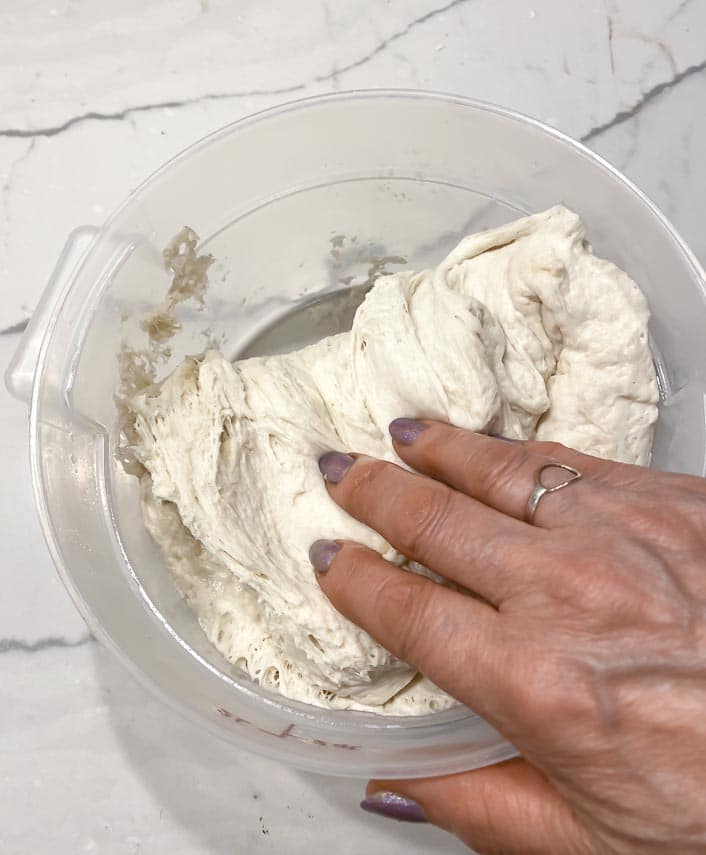
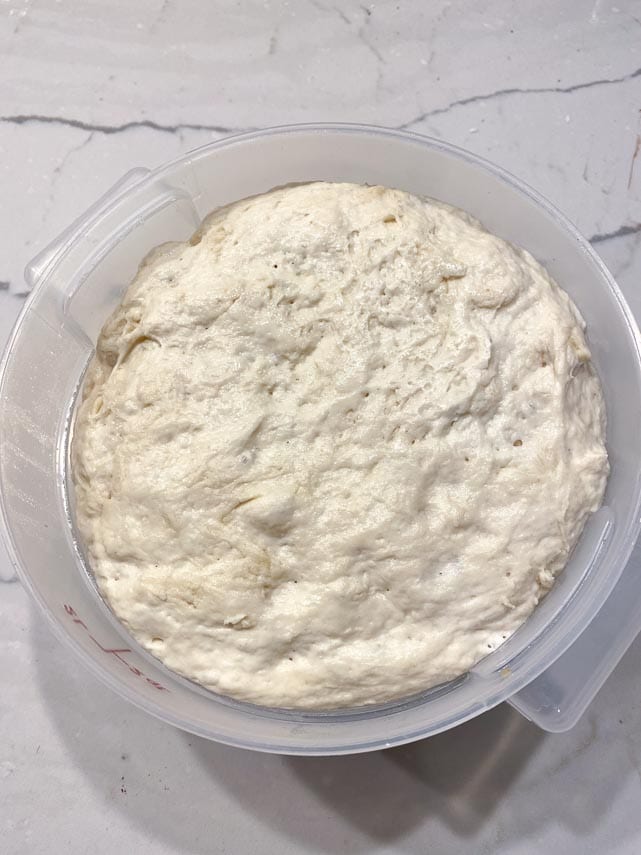
Cover the container and bulk ferment the dough at room temperature for 12-hours, or overnight, or as long as it takes until you see at least 50% expansion, sometimes explained as doubling in bulk. How much you allow the dough to proof will come with practice and you will determine what works for you in terms of the temperature of your room, what the resulting dough is like and your preferences in the final result. 50% expansion is the minimum.
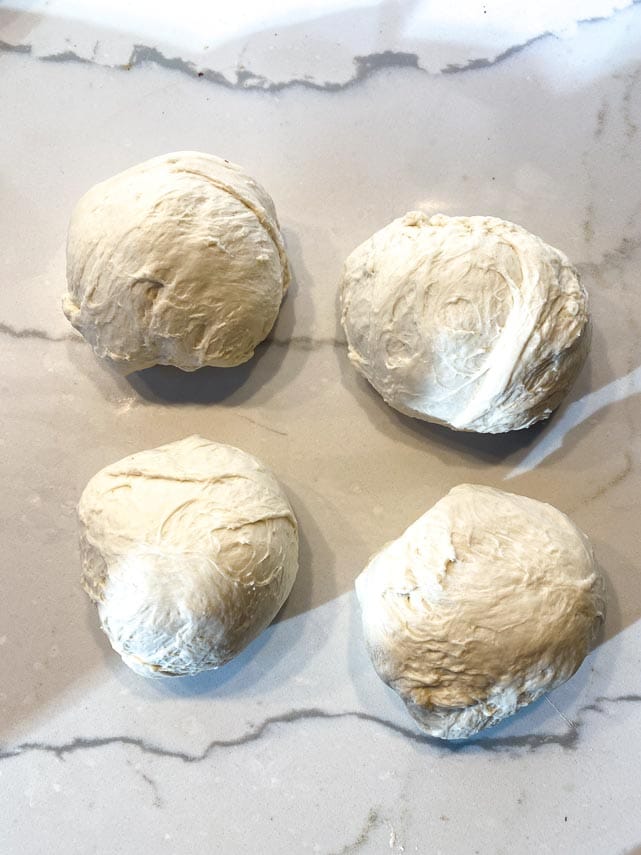
About 12-Hours Later: Unmold the dough onto your work surface. Use a bench scraper to divide the dough into four equal portions and then round off these balls. Place the balls in a covered container – either one large container that allows room for expansion, or individual containers – and refrigerate for 6 hours or up to 36 hours.
2-Hours Before Baking: Remove the dough ball(s) from the refrigerator at least 2-hours before you want to start baking. If your room temperature is cool, you might give yourself more time.
Have sauce, cheese and toppings ready to use. Position rack in upper third of oven. Preheat oven to 500°F (260°C).
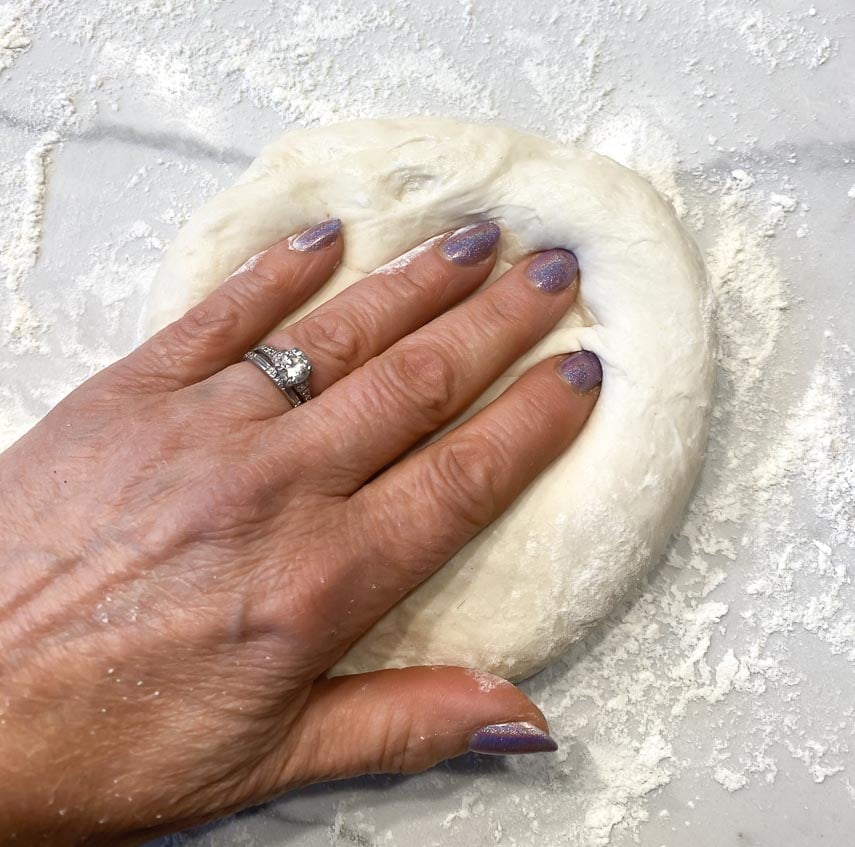
Place a 12-inch (30.5 cm) cast-iron pan over a medium heat burner on top of the stove to preheat. You want to get it very hot, but not smoking. Meanwhile pat out one dough ball to about 9-inches (23 cm).
When the pan is hot, scatter a tiny bit of cornmeal on the pan.
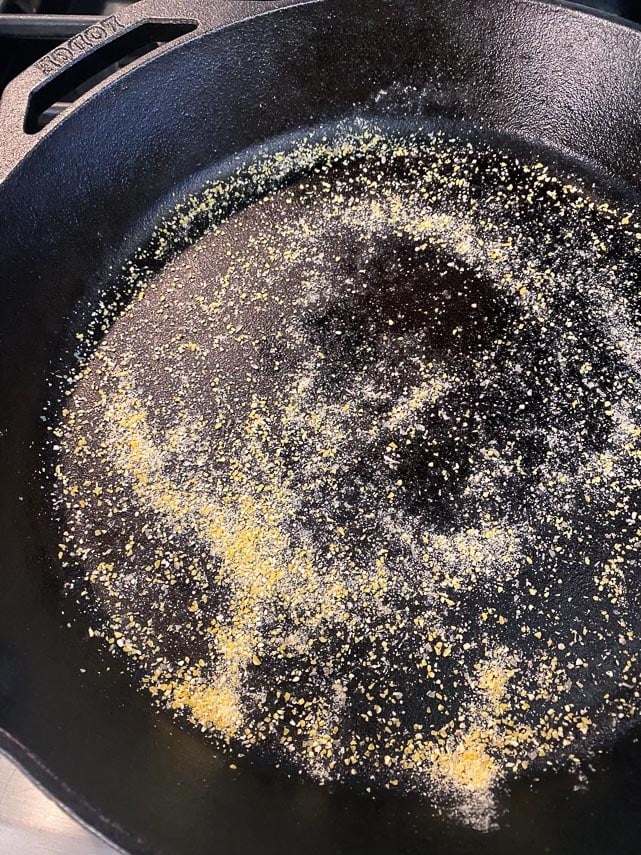
Immediately – and carefully – transfer the dough to the pan. Don’t burn yourself! Brush the dough lightly with olive oil.
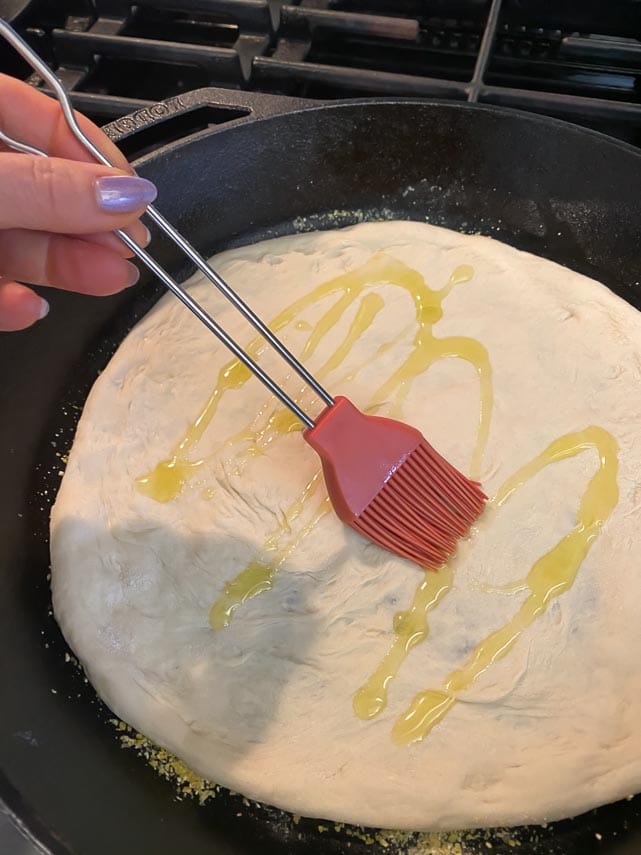
Cook it over the burner until the dough starts to bubble a bit. Immediately spread with about ¾ cup (180 ml) of your chosen sauce going all the way to the edge. Top with cheese and any other desired low FODMAP toppings.
Place in the oven and bake for about 10 to 15 minutes or until the cheese is melted, bubbling, and golden. Serve immediately! You can then make the subsequent pizzas, or, if you have a second pan, do two at once. Because of the logistics of prepping these pizzas, I do not recommend making more that 2 at a time. Also, more than two in the oven at once do not bake as well as I like.
FODMAP Information
Our recipes are based on Monash University and FODMAP Friendly science.
- Canned Tomatoes: Monash University has lab tested canned tomatoes and they are low FODMAP at 92 g or 3.2-ounces, which they say is about ⅗ of a cup. Moderate FODMAPs kick in at about ¾ cup or 115 g, at which point fructose can become an issue.
- Cheese: Many cheeses have low FODMAP serving sizes. The low FODMAP diet is not a dairy-free diet. Hard cheeses such as Parmigiano Reggiano or Pecorino Romano have been lab tested by Monash University and are low FODMAP in 40 g amounts.
- Oil: All pure oils are fats and contain no carbohydrates, therefore they contain no FODMAPs.
- Tomatoes: Both Monash University and FODMAP Friendly have lab tested common, beefsteak tomatoes. Monash University lab tests have shown no FODMAPs. FODMAP Friendly gives them a “Pass” at ½ cup (75 g) portions. Cherry tomatoes and Plum (Roma) tomatoes have also been tested by Monash and FODMAP Friendly. Both Monash and FODMAP Friendly recommend 75 g of cherry tomatoes as a serving (about 5 or ½ cup) and 75 g of plum or Roma tomatoes, which is about 1 small tomato or ½ cup.
- Wheat Flour: The low FODMAP diet is neither wheat-free nor gluten-free. Small amounts of wheat are low FODMAP. For instance, 35 g of wheat bread made with white wheat flour – about 1 slice – has been lab tested by Monash University and is deemed low FODMAP.
Please always refer to the Monash University & FODMAP Friendly smartphone apps for the most up-to-date lab tested information. As always, your tolerance is what counts; please eat accordingly. The ultimate goal of the low FODMAP diet is to eat as broadly as possible, without triggering symptoms, for the healthiest microbiome.

Low FODMAP Sourdough Pizza
This Low FODMAP Sourdough Pizza joins our collection of pizza recipes, which range from super-simple, to wood-fired Neapolitan-Style and several in-between. You can read more in Everything You Need To Know About Low FODMAP Pizza. This recipe begins with a Sourdough Starter, which we teach you to make in that recipe, and then the recipe for the sourdough pizza itself is here below.
Low FODMAP Serving Size Info: The serving size is going to depend on your toppings; eat to your tolerance. An average of 12 servings is a good place to start.
Ingredients:
Pizza Dough:
- 1 1/3 cups (315 ml) warm water; just make it warm to the touch
- 2 teaspoons salt
- ½ cup (120 g) room temperature sourdough starter
- 2 tablespoons extra virgin olive oil
- 17.6- ounces (500 g) organic unbleached bread flour (white wheat), such as King Arthur Organic Bread Flour, plus extra
- Medium-grind cornmeal
- Extra virgin olive oil
Sauce & Toppings:
- 3 cups (720 ml) Low FODMAP Pizza Sauce, Quick Everyday Tomato Sauce or low FODMAP marinara
- 1 ¼ – pounds (570 g) shredded low-moisture mozzarella
- Low FODMAP toppings as desired
Preparation:
-
24-hours Before Serving – For Making By Hand: Stir the warm water and salt together until salt dissolves in a large mixing bowl. Stir in the sourdough starter and olive oil, then add the 500 g of flour using a combination of stirring and folding until all ingredients are combined well. At first the mixture will look shaggy. At that point use your hands to work the dough and knead it enough for the dough to come together into a moist, springy ball.
-
24-hours Before Serving – For Making With A Stand Mixer: Stir the warm water and salt together until salt dissolves in a stand mixer bowl. Stir in the sourdough starter and olive oil, then add the 500 g of flour using the dough hook on a low-medium speed until all ingredients are combined well. At first the mixture will look shaggy. At that point you can continue to use the mixer and dough hook, or use your hands to work the dough and knead it enough for the dough to come together into a moist, springy ball.
-
Whichever way you prepare the dough, scrape into a clean container with room for expansion, cover it well and allow to sit at room temperature for 30 minutes to 1 hour (whatever works for your schedule). Use your hands to bring the bottom of the dough up and over the top, gently stretching as you go. (I moisten my hands a bit to minimize sticking). Turn the container and repeat the stretch and fold action several times. I usually do about 4 to 6 stretch/folds.
-
Cover the container and bulk ferment the dough at room temperature for 12-hours or overnight or as long as it takes until you see at least 50% expansion and up to double in bulk. How much you allow the dough to proof will come with practice and you will determine what works for you in terms of the temperature of your room, what the resulting dough is like and your preferences in the final result. 50% expansion is the minimum.
-
About 12-Hours Later: Unmold the dough onto your work surface. Use a bench scraper to divide the dough into four equal portions and then round off these balls. Place the balls in a covered container – either one large container that allows room for expansion, or individual containers – and refrigerate for 6 hours or up to 36 hours.
-
2-Hours Before Baking: Remove the dough ball(s) from the refrigerator at least 2-hours before you want to start baking. If your room temperature is cool, you might give yourself more time.
-
Have sauce, cheese and toppings ready to use. Position rack in upper third of oven. Preheat oven to 500°F (260°C).
-
Place a 12-inch (30.5 cm) cast-iron pan over a medium heat burner on top of the stove to preheat. You want to get it very hot, but not smoking. Meanwhile pat out one dough ball to about 9-inches (23 cm).
-
When the pan is hot, scatter a tiny bit of cornmeal on the pan and immediately – and carefully – transfer the dough to the pan. Don’t burn yourself! Brush the dough lightly with olive oil and cook it over the burner until the dough starts to bubble a bit. Immediately spread with about ¾ cup (180 ml) of your chosen sauce going all the way to the edge. Top with cheese and any other desired low FODMAP toppings.
-
Place in the oven and bake for about 10 to 15 minutes or until the cheese is melted, bubbling, and golden. Serve immediately! You can then make the subsequent pizzas, or, if you have a second pan, do two at once. I do not like to make more than 2 at a time both because the logistics of prepping the pizza and also more than 2 do not bake in the oven as well as I like.
Notes:
FODMAP Information
Our recipes are based on Monash University and FODMAP Friendly science.
- Canned Tomatoes: Monash University has lab tested canned tomatoes and they are low FODMAP at 92 g or 3.2-ounces, which they say is about ⅗ of a cup. Moderate FODMAPs kick in at about ¾ cup or 115 g, at which point fructose can become an issue.
- Cheese: Many cheeses have low FODMAP serving sizes. The low FODMAP diet is not a dairy-free diet. Hard cheeses such as Parmigiano Reggiano or Pecorino Romano have been lab tested by Monash University and are low FODMAP in 40 g amounts.
- Oil: All pure oils are fats and contain no carbohydrates, therefore they contain no FODMAPs.
- Tomatoes: Both Monash University and FODMAP Friendly have lab tested common, beefsteak tomatoes. Monash University lab tests have shown no FODMAPs. FODMAP Friendly gives them a “Pass” at ½ cup (75 g) portions. Cherry tomatoes and Plum (Roma) tomatoes have also been tested by Monash and FODMAP Friendly. Both Monash and FODMAP Friendly recommend 75 g of cherry tomatoes as a serving (about 5 or ½ cup) and 75 g of plum or Roma tomatoes, which is about 1 small tomato or ½ cup.
- Wheat Flour: The low FODMAP diet is neither wheat-free nor gluten-free. Small amounts of wheat are low FODMAP. For instance, 35 g of wheat bread made with white wheat flour – about 1 slice – has been lab tested by Monash University and is deemed low FODMAP.
Please always refer to the Monash University & FODMAP Friendly smartphone apps for the most up-to-date lab tested information. As always, your tolerance is what counts; please eat accordingly. The ultimate goal of the low FODMAP diet is to eat as broadly as possible, without triggering symptoms, for the healthiest microbiome.
Nutrition
All nutritional information is based on third-party calculations and should be considered estimates. Actual nutritional content will vary with brands used, measuring methods, portion sizes and more. For a more detailed explanation, please read our article Understanding The Nutrition Panel Within Our Recipes.


Can you freeze this dough?
In theory, yes. I never have.
Once I began pressing dough, I couldn’t get the dough off the counter as it stuck. The dough also started breaking apart
Any idea
Hi there Ellana, it is hard to tell what happened as every yeast dough batch is its own living thing and can act differently. Sometimes you need some flour, other times none at all. You could try lightly dusting your surface with flour, or even rubbing some olive oil on the counter, which is a great approach for this recipe.
Thanks. Will use stiffer starter next time.