This Wood-Fired Low FODMAP Neapolitan-Style Pizza does require a wood-fired oven that reaches temperatures of at least 900°F (482°C) – I use an Ooni Pro and an Ooni Karu 16-inch Multi-Fuel – as well as very specific ingredients. I know that all of you don’t have a cooking source like this available, but for those who do, I wanted to bring you a version of a wood-fired low FODMAP pizza. This dough is based on a long, 3-day fermentation period, FYI, so you have to plan ahead. As with any recipe, read this through before starting.
First Let’s Define Neapolitan Pizza
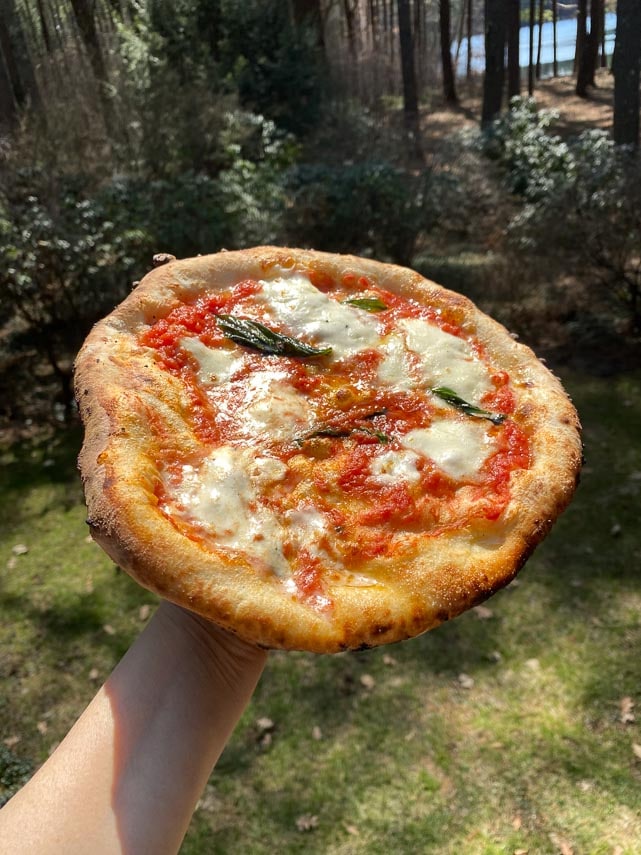
Neapolitan pizza, or pizza Napoletana, can only properly be prepared within the confines of Naples, Italy, which is why we call our recipe Neapolitan-style. The designation “Traditional Speciality Guaranteed”, or “TSD”, differentiates a Naples pizza from all others.
A Neapolitan pizza uses specific ingredients and cooking techniques, which you can read about in the official Italian government document HERE, which is fascinating. If you don’t read Italian, you can use Google Translate.
Protected Status
As of December 2017, the art of Neapolitan pizza-making was added to UNESCO’s Representative List of the Intangible Cultural Heritage of Humanity. (UNESCO being the United Nations Educational, Scientific and Cultural Organization). They have even recognized the pizza makers, the “pizzaiuoli”, or pizza chefs, as living links to this revered food art.
Pizza Ovens
We have to address the elephant in the room. This is not the pizza recipe to make in your home oven. For that we have several other recipes from which you can choose, and they are all linked within our main pizza hub article, Everything You Need To Know About Low FODMAP Pizza and also discussed in Low FODMAP Pizza Equipment & Ingredients. So, if you do not have an oven that can hit 900°F (482°C), click on over to that article to choose a different recipe.
The pizza oven at our FODMAP Everyday® Test Kitchen is an Ooni Pro. This exceptional oven is artful enough to be a delight to the eye. I get excited each time I walk out on my deck and see her; we named her Incinderella.
But she is also a workhorse. Just take a look at these flames.
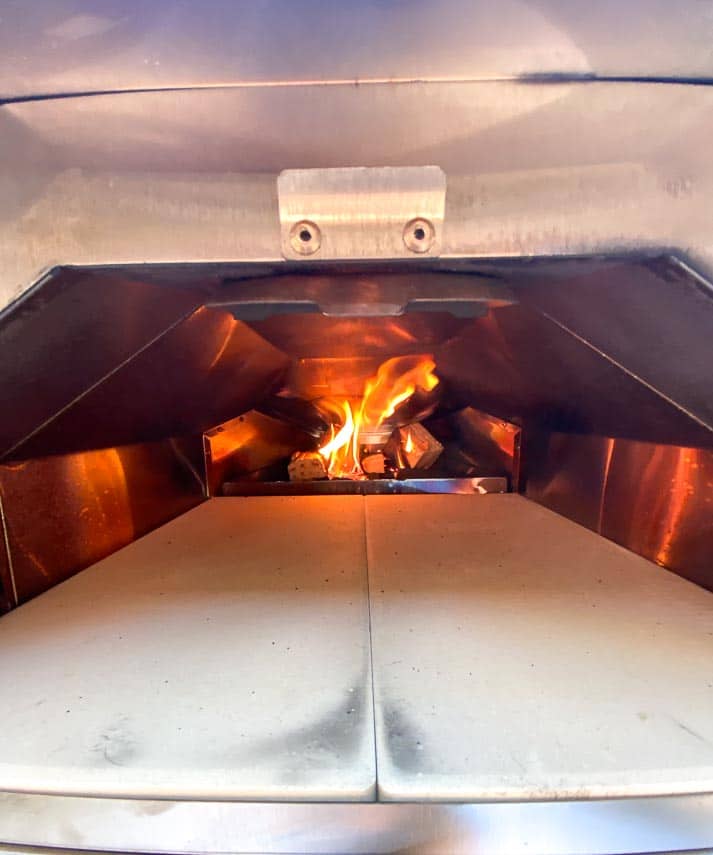
She can crank up to 932°F (500°C). True Neapolitan pizza is typically fired at about 800°F to 1000°F (427°C to 538°C) and cooks in about 60 to 90 seconds (as does this recipe), so you need an oven that can handle this kind of heat.
To repeat, this dough, from the choice of flour to the level of hydration, was developed from the ground up to be cooked at very high heat in a very short time. Use this recipe for this approach.
The Ooni Pro is the largest Ooni model (at this time), and I love it for its flexibility. It is large enough for a 16-inch (40.5 cm) pizza, it is tall enough to handle a whole chicken or Low FODMAP Wood-Fired Standing Rib Roast (coming soon), it makes the most amazing artisanal bread, and it can work with charcoal, wood, or you can purchase an optional gas-burner.
Assembling The Ooni Pro In Less Than 6-Minutes
We have a video of assembling the Ooni Pro, which couldn’t be easier. Less than 6-minutes out of the box and you are up and running. Then you are supposed to do an initial burn, to season it before cooking your first pizza.
We have videos showing the super-simple assembly and the initial burn in our article, Low FODMAP Pizza Ingredients & Equipment. Be sure to check that post out.
Then, once it is seasoned, you are ready to cook Neapolitan-Style pizza after a 20-minute preheat.
Here we are cooking with Incinderella!
Other Pizza Ovens
We have recommendations for other pizza ovens, and more info on the Ooni brand models, in our Low FODMAP Pizza Ingredients & Equipment article. You do have choices! Some are wood-fired, some are multi-fuel, but all get up to high temperatures, which is what you need to make this pizza.
Pizza Napoletana Ingredients
In addition to an oven that gets up to about 900°F (482°C) there are particular ingredients that are considered necessary to make this type of pizza. From a classic perspective, two main kinds of traditional pizza are allowed in Naples:
1. Napoletana Marinara, features a leavened pizza base with marinara, garlic and oregano.
2. Pizza Margherita, of which there are two sub-types: Neapolitan pizza Margherita Extra uses buffalo mozzarella from Campania D.O.P (Denominazione d’Origine Protteta), fresh basil and fresh tomato; the Neapolitan pizza Margherita, which is TSG (Traditional Status Guaranteed) uses fior di latte mozzarella, from the Southern Apennines, and fresh basil.
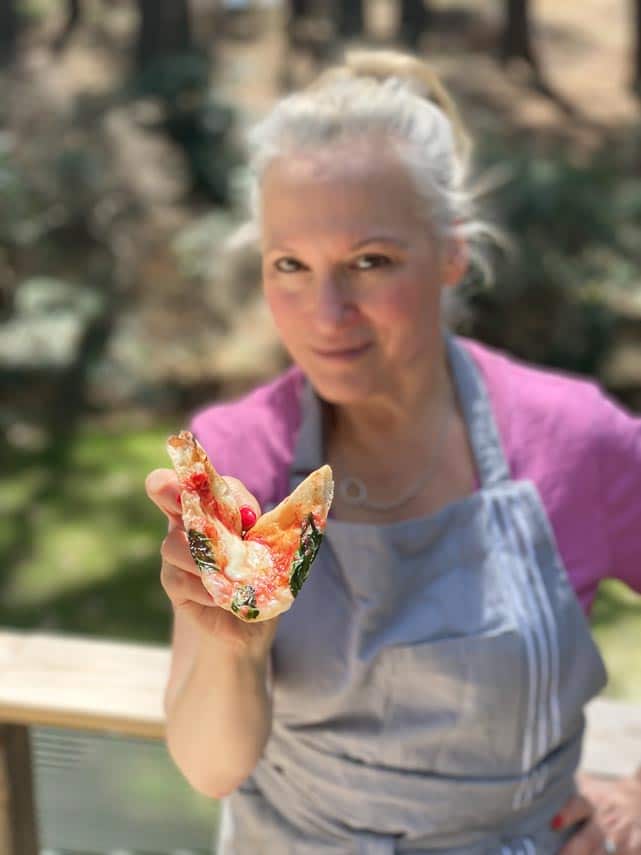
Let’s look at the ingredients one by one:
Sauce For Neapolitan Pizza
Pizza sauce, which is not the same as sauce for pasta, BTW, must contain San Marzano Tomatoes. The San Marzano D.O.P. tomato designation signifies both a particular type of plum tomato as well as the fact that it is grown in a very specific region of Italy – the Agro Sarnese Nocerino of the Sarno River valley near Mount Vesuvius. But you can buy canned and should.
Read more about these tomatoes in our Pizza Sauce recipe, which will take you through the simple steps to make the best possible sauce for this Neapolitan-Style Pizza.
And yes, even the true Italian pizzaiuoli use canned San Marzano tomatoes – just as we recommend.
Choose Your Mozzarella
In Naples, two kinds of cheese are featured, as mentioned above.
Neapolitan pizza Margherita Extra uses the buffalo mozzarella, and the Neapolitan pizza Margherita uses fior di latte (cow’s milk) mozzarella from the Southern Apennines (capitalization courtesy Italian government).
Do I ever use firm mozzarella, as you find on typical American pizzas? Yes, but not in my Neapolitan-style pizzas. Check out our article Everything You Need To Know About Low FODMAP Pizza for links for other pizza recipes that use firm, low-moisture mozzarella and other ingredients.
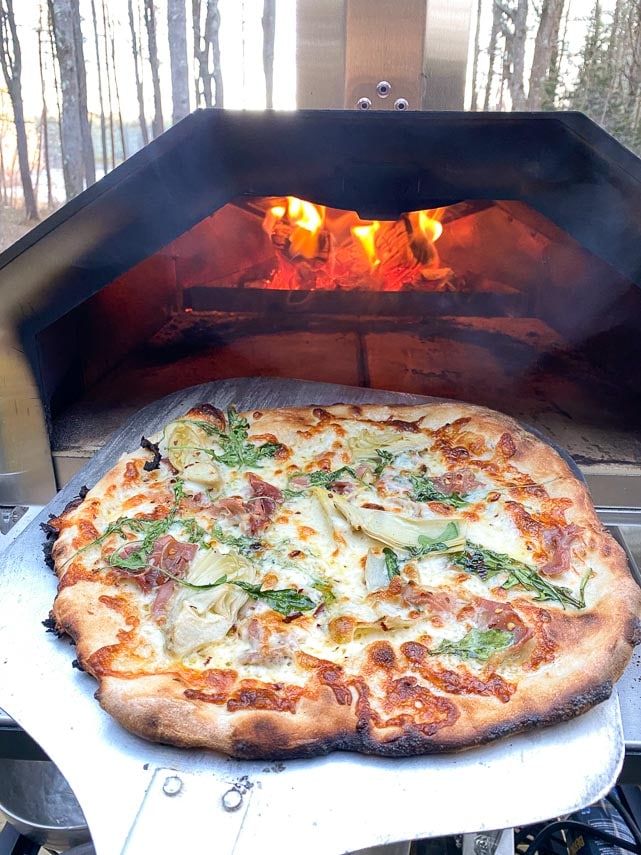
Additional Neapolitan Pizza Specifics
The Italian government specifies that a wood-fired oven be used, as mentioned. The flour should be made from soft wheat, with between an 11% and 12.5% protein, with a “00” designation for milling.
50 to 55% hydration (flour to water ratio) is recommended but they do allow for the pizza maker to use their skills to determine the exact level. Each raw dough ball is to weigh between 180 g and 250 g. Our dough hydration is about 60% and uses similarly sized dough balls.
And true Neapolitan pizza should be consumed immediately, as soon as it is baked, in the same location as where it was made. Removal of the product from the premises can mean the pizza loses its TSD designation.
We have attempted to stay tried and true to as many of these directives as possible.
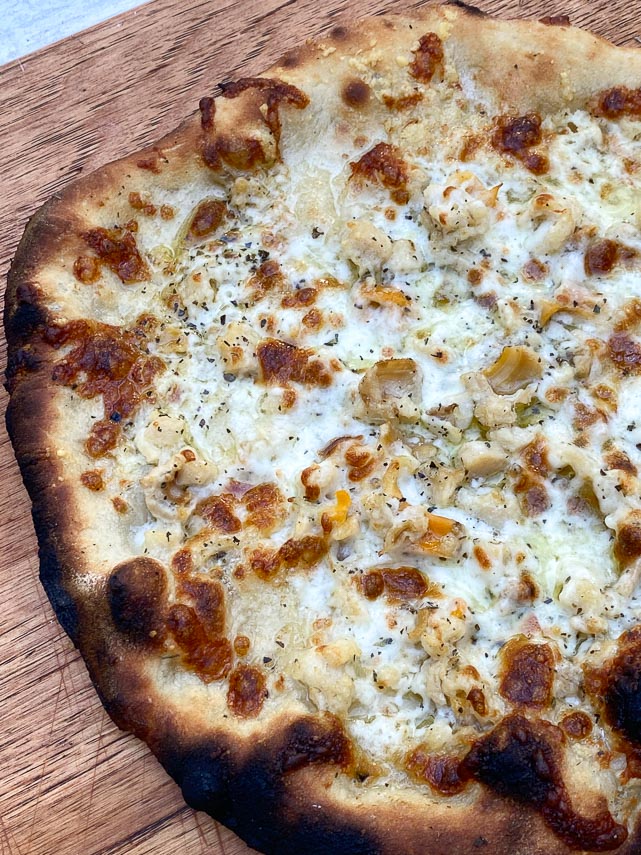
What Makes This Recipe Low FODMAP?
Great question! First let’s define “low FODMAP”. I have approached this recipe from an educated point of view and am expecting you to have done your homework on the diet.
For instance, many people are under the mistaken impression that the diet is both gluten-free and wheat-free, which is not the case.
This Recipe Is Low FODMAP, Not No FODMAP
The low FODMAP diet is “low FODMAP” not “no FODMAP”. Secondly, some of us are sensitive to some FODMAPs and not others. This is the very reason we have a Recipe Filter that allows you to search for recipes that are suitable for Elimination (look for our kiwi logo), or, if you know that you can tolerate fructans or polyols, you can widen your search.
In this recipe we are mostly concerned with fructans (which are found in wheat flour) and it would behoove you to know your tolerances to them. Also please read our article How To Choose Low FODMAP Bread, which delves deeply into ingredients that are typically found in bread and bread-related foods, like pizza.
This recipe is lower in fructans, but it is an indeterminate lower amount, therefore we have erred on the side of caution and labeled it as low in Disaccharides, Monosaccharides and Polyols but containing some amount of Oligosaccharides.
The 72-hour fermentation lowers the fructan content.
Always eat to your tolerance, which you will determine during structured Elimination and Challenge Phases.
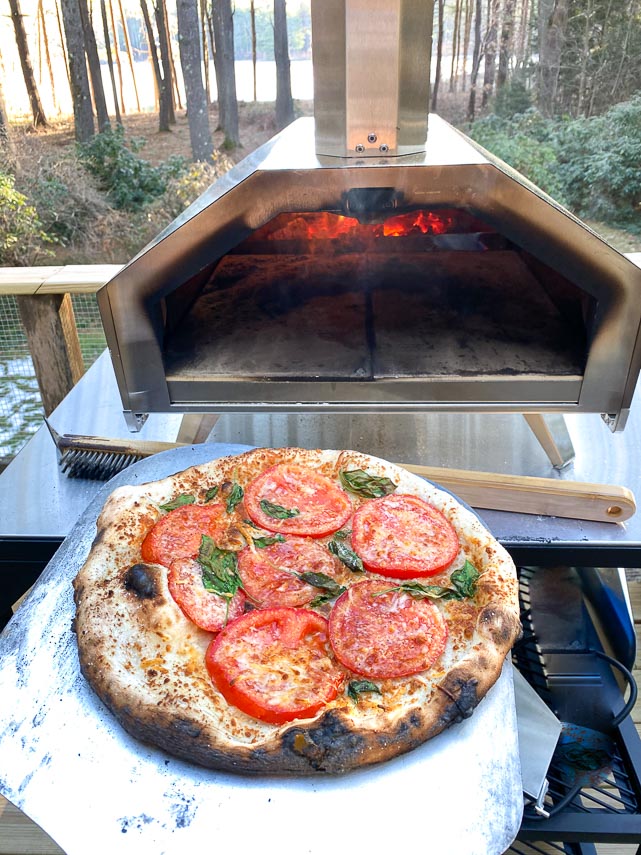
Monash Explains Fermentation
Our Neapolitan-Style Pizza dough undergoes a 72-hour fermentation. During the act of fermentation fructans in the recipe’s flour are consumed by yeasts, lowering the fructan content of the final product. The strains and species of wild yeasts that are gathered from the air itself, the yeast used in the recipe, the length of time the dough ferments, the temperature, the dough’s acidity – all of these factors affect the fructan reduction.
In this article in the Journal of Food Sciences & Nutrition, a study assessed 3 different sourdough breads, using 6 different strains of bacteria, and the lab tests showed a 92.6% reduction, 79% and 70.4% reduction in fructans in the 3 sourdough loaves (which also had baker’s yeast added, by the way).
The loaves made only with baker’s yeast had less of a reduction, but fructans were still reduced somewhat and Monash is quick to point out that for more exacting FODMAP information, nothing is certain without lab testing of individual loaves and recipes.
Sourdough vs. Fermentation
Merriam-Webster defines sourdough bread as: “a leaven consisting of dough in which fermentation is active”, and we certainly see that in our Low FODMAP Sourdough Pizza. But when it comes to the low FODMAP diet, what we are looking for is a reduction of fructans (not just classic sourdough taste) and that can take place in a traditional sourdough as well as in a fermented dough made with baker’s yeast, such as this one. And the longer the fermentation time the greater the fructan reduction and ours is 72-hours long, which is on the longer side.
If you do not have a pizza oven that cranks up to 900°F (482°C) please check out our 72-Hour Ferment Low FODMAP Pizza recipe, which is geared towards home ovens.
So, to recap, the dough in this Neapolitan-Style Pizza is fermented for a long period and fructans are reduced – we just do not know specifics without lab testing, and chances are that each batch would be different anyway!
Eat to your own tolerances.
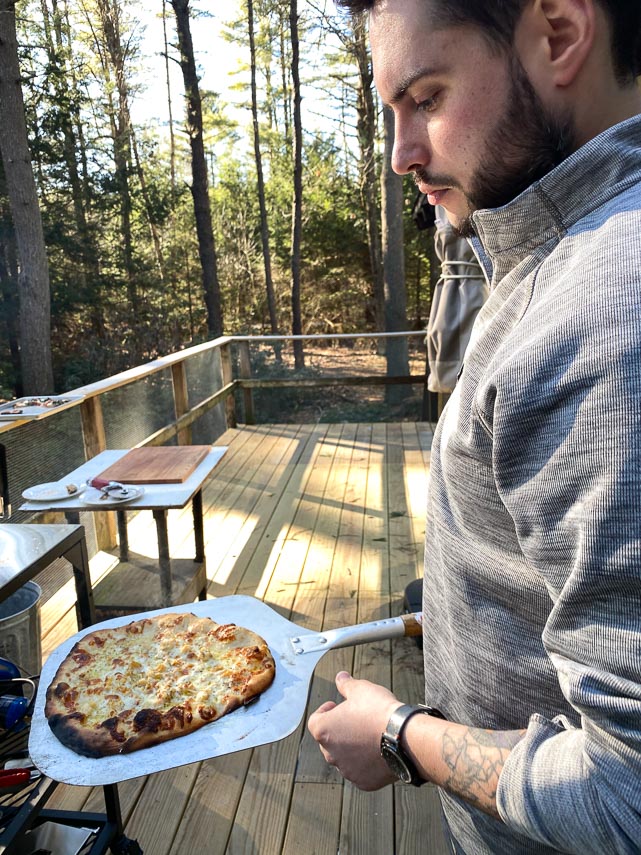
Charcoal vs. Wood Fired Pizza
I grew up in NYC and charcoal-fired pizza is traditional. There is a certain quality to the flavor of a pizza made with charcoal and I am partial to it. Charcoal burns hot and the brick, coal-fired ovens, found in New York City pizza institutions, such as Lombardi’s, are a thing of beauty and history.
Since my Ooni fires with charcoal, wood, or both, I have use it all three-ways. Once you start to work with the oven you will discover your favorite approach. Buying a multi-fuel oven gives you options!
A Note On Cooking Times
I know it seems impossible to cook a pizza in 60 to 90 seconds, but I assure you that at 900°F (482°C) this is exactly how fast it goes. This pizza does cook quickly, which might seem like a boon (and it is), but it also requires your constant attention. Do not try and pat out the next round of dough while you have one cooking.
I have found that this pizza must be moved and rotated about every 5 to 10 seconds. Yes, this is very hands on, there is no way getting around that. But it is a max of 90 seconds of your time, so enjoy the flame and monitoring. It is actually quite mesmerizing watching the pizza puff and char and cook before your eyes. A turning peel, with its small diameter, is a must for manipulating the pizza in the very hot oven.
The designated cooking time for this recipe was hard to peg. I decided on 10 minutes total to make about 4 pizzas from one batch of dough. Adjust accordingly.
Ingredients For Neapolitan-Style Pizza
Flour, water, yeast and salt are the only dough ingredients, and the type of flour is key.
High Temperature, Long Fermentation 00 Pizza Flour
For this dough, which is intended for a 900°F (482°C) oven, I use a particular Italian 00 flour – the “blue” Caputo Flour, which is meant for high heat and long fermentation. In fact, they call it their “Pizzeria” flour. Our 72-Hour Ferment Low FODMAP Pizza dough meant for the home oven uses a different flour and technique.
BTW, it is curious and wonderful that Italians often refer to this kind of 00 flour and long ferment as yielding a more “digestible” pizza, even though they never mention FODMAPs. You see this same awareness in sauces such as Rao’s Sensitive Marinara. Made without garlic or onions, which are also fructan-rich, there is an understanding that this sauce is easier to digest, again with no FODMAPs even mentioned. But we know it is all about the FODMAPs!
Here is information direct from Caputo:
- The Blue Pizzeria Flour is a blend of soft white wheat with a higher amount of Farina Manitoba (Triticum aestivum) to give dough more strength.
- Protein content is 12.5%, approved by the Italian government for Neapolitan pizza.
- “Tipo 00” refers to how refined the flour is; it is refined further than regular flour.
- 00 flour is made by using less of the outer parts of the wheat and is a very finely ground product.
- The flour provides elastic, resistant gluten and a protein level meant for a long-rise dough.
- It is developed for baking in a high temperature wood-fired or gas-fired oven (900 °F/482°C and over).
- Bakes a soft, flavorful crust for an authentic pizza with bubbles in the cornicione or raised rim (say Core-nay-chonay). In contrast a NY style pizza has a flatter edge, which is more bread-like, and doesn’t sport the simultaneously crusty and airy rim.
Instant Dry Yeast Is Easy To Use
I like the ease of instant dry yeast as it does not need to be proofed in water prior to using; it is simply added to your dry ingredients.
Use Table Salt, Not Kosher Salt
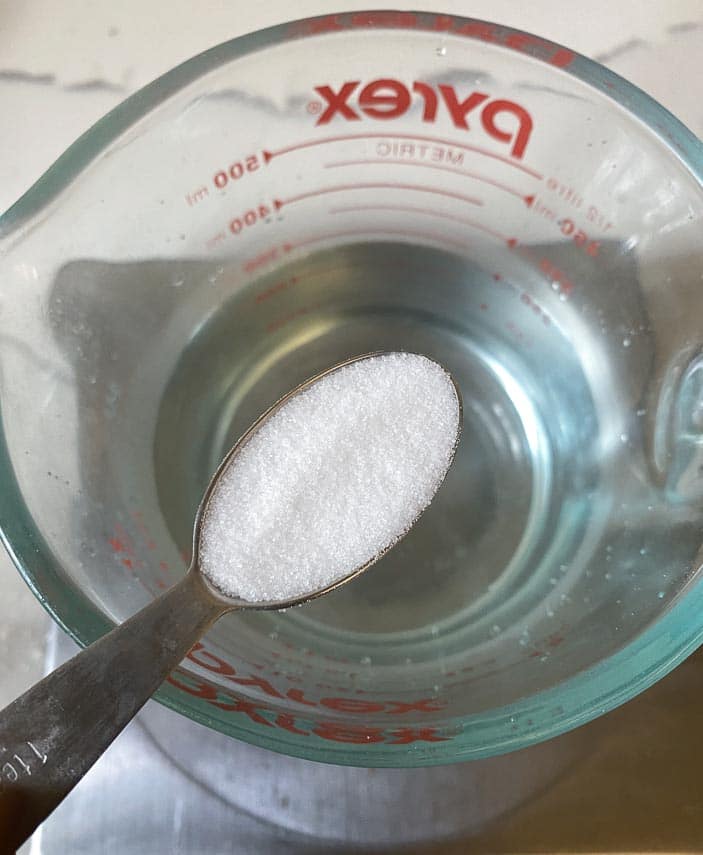
Some pizza makers like to dissolve their salt in the warm water, as opposed to whisking it into the dry mixture, as salt can retard yeast growth, but this is not an issue with instant dry yeast. However it is a great way to get the salt dissolved and dispersed. Please use table salt and not kosher salt, or your measurements will be inaccurate.
Frequently Asked Questions
Is tapwater OK? That depends. You don’t want water that is very hard and high in minerals (200ppm – parts per million of calcium and magnesium) because it can affect the culture in your dough, but you don’t want very soft water either (50ppm). You also don’t want overly chlorinated water.
Some pizza pros suggest water that is medium in hardness (100ppm to 150ppm) and a pH of about 7 as optimal.
If you have chlorinated water, one trick is to leave it out overnight to allow some chlorine to dissipate.
Water that is too hot can kill the yeast, but one thing is clear when discussing water temp with pizzas pros – the ambient room temperature can have an affect on the dough’s rise. Are you in a hot, humid location? Or is there snow and cold weather outside? As you make more pizza you will learn which water temperature is best for your situation. There are hot pizzerias that use cool water! Do not go above the temperatures listed.
For this recipe I do suggest you weigh your flour. It is very fine in texture and it is not easy to provide accurate volume measurements. I use this OXO model.
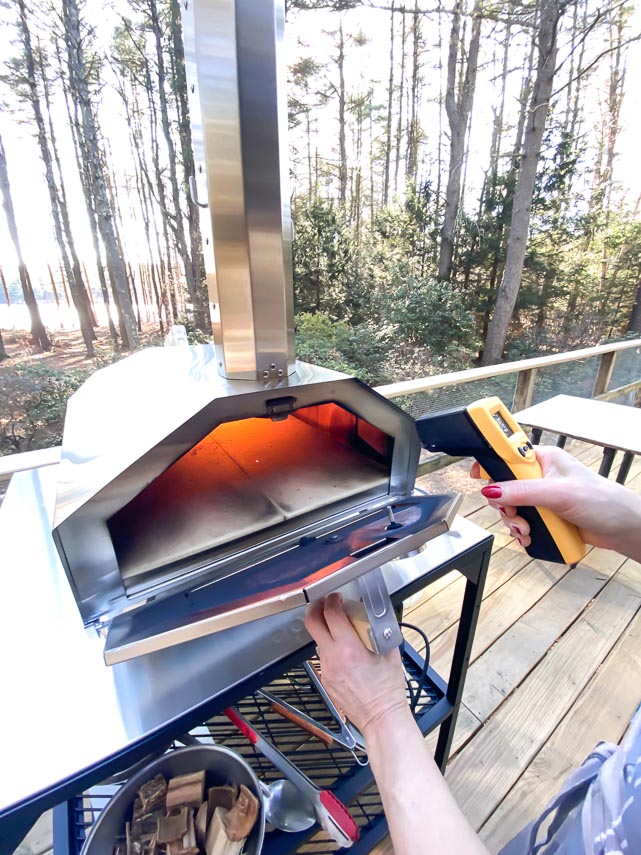
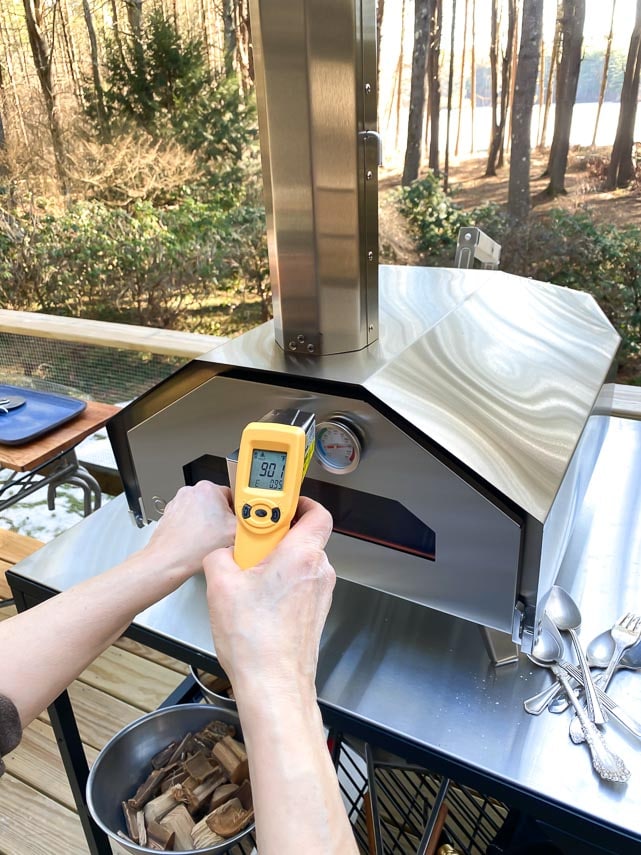
I highly suggest that you use an infrared thermometer. Even though my Ooni Pro has a built-in thermometer, it is representing the oven temperature, not the deck upon which you launch your pizza. I want the deck to be 900°F (482°C). Even Ooni recommends that you use one. This Thermoworks gun is very well designed and built.
I believe you need two peels for using your high temperature oven.
Wooden Peel – You need a wooden peel to launch your pizza into the oven. You can use a large metal peel, but many pizza makers feel that you will have an easier time of launching your uncooked pizza into that oven when using wood. A good dusting of flour acts as a buffer between your peel and dough.
Metal Turning Peel – What is a turning peel? It is a small diameter peel that you NEED to help move the pizza around while it is cooking. Remember, these pizzas cook in 60 to 90 seconds, but they have to be constantly moved during that time. I usually move mine around about every 10 seconds. TEN SECONDS. You need an agile tool to perform this action. I use this one from Ooni.
The terminology for getting your pizza into your oven is referred to as “launching”. The oven is super-hot, which means you have to launch it in there quickly and safely.
You will pat out your dough ball on a lightly floured surface. Then you have a choice. Some pizza-makers top the pizza, then move it to the peel. Others move the patted-our dough round to the peel and then top it with sauce and cheese. Try it both ways and see which works best for you.
Either way, scatter some extra flour on your peel before you move the dough over. It will act as little ball-bearings between your pizza and peel and will facilitate your launch. I don’t use cornmeal with this pizza as it takes away from the delicacy of the dough.
When it is time to launch it is all about speed and decisiveness. Open the oven door, insert the peel towards the rear of the oven, slightly angled downwards. Barely touch it to the deck and launch your pizza with a very quick, firm and purposeful movement, projecting your pizza forward as you pull the peel backwards. Your pizza is now launched! Get ready to watch it and turn it frequently do that it doesn’t burn.
Teamwork
Once your pizza is launched into the oven you must monitor it constantly. You cannot pat out the next pizza at the same time – so enlist a friend! One of you can cook while the other preps.
Anything you like, but to stay classic, follow the traditional approach of simple Pizza Sauce, fresh mozzarella and fresh basil. You can add the basil when it comes out of the oven, but in Italy it is most often added before.
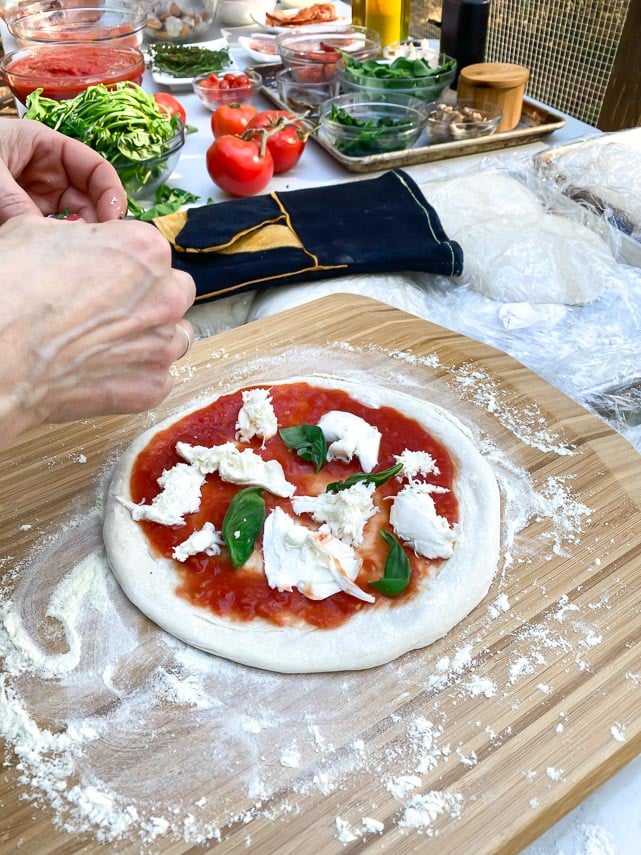
The amounts of sauce and cheese given below is generous for your 4 pizzas. In fact, you might not use the entire amounts. Use our images to help you assess. In general, a Neapolitan-style pizza is very lightly topped. If you want a toppings-heavy pizza, try our Deep-Dish Pizza!
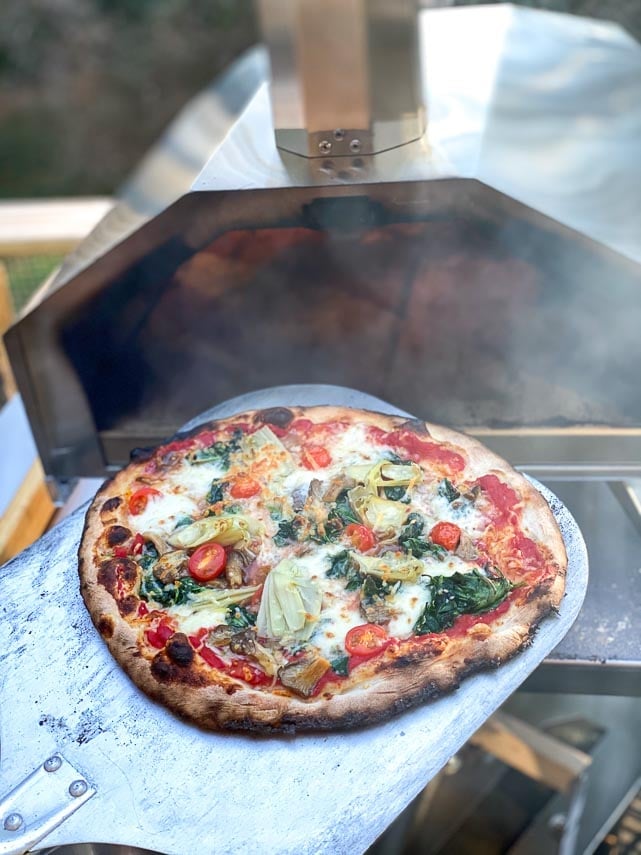
OK, if you want to be as traditional as possible in your creation of a Neapolitan-Style pizza you will stick with the tomato/cheese/basil approach. But we will never be ones to stifle creativity! Just take a look at what we have made with our wood-fired pizza oven and Neapolitan dough:
· White Pizza with Low FODMAP Pesto
· White Clam Pizza with oregano and Pecorino Romano
· Even a Breakfast Pizza with egg, spinach and bacon
· Bacon & Roasted Red Pepper Pizza
· White Pizza with Pancetta
· Sweet Pineapple Pizza with Lactose-Free Sour Cream & Honey
· Veggie Packed Pizza
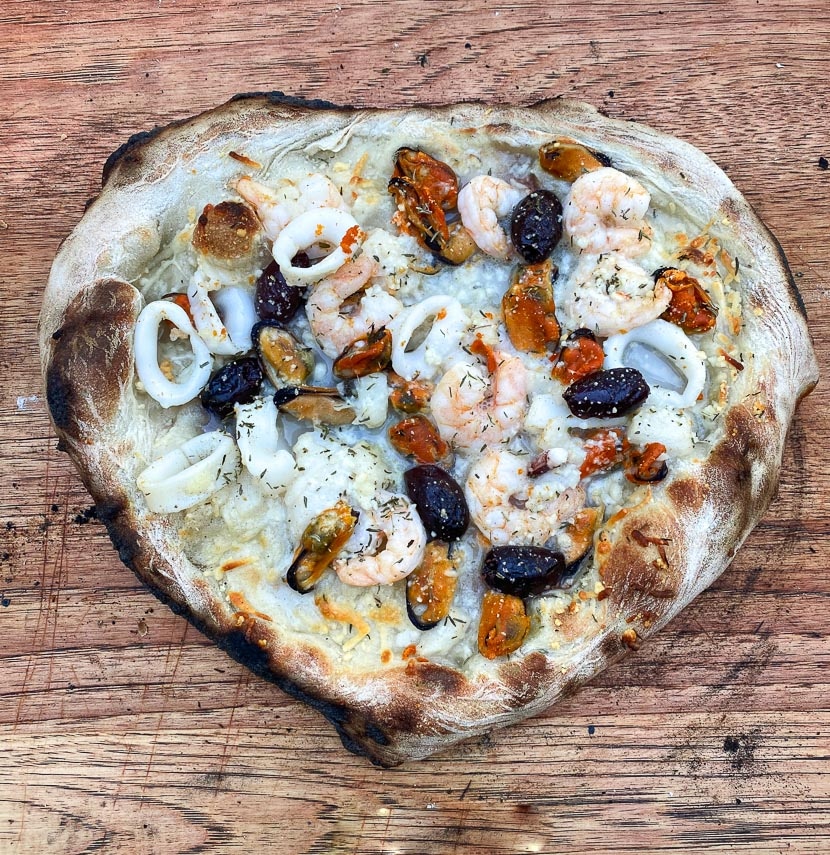
· Seafood Pizza – ours came out heart shaped; look below!
· Artichoke, Prosciutto, Pesto Pizza
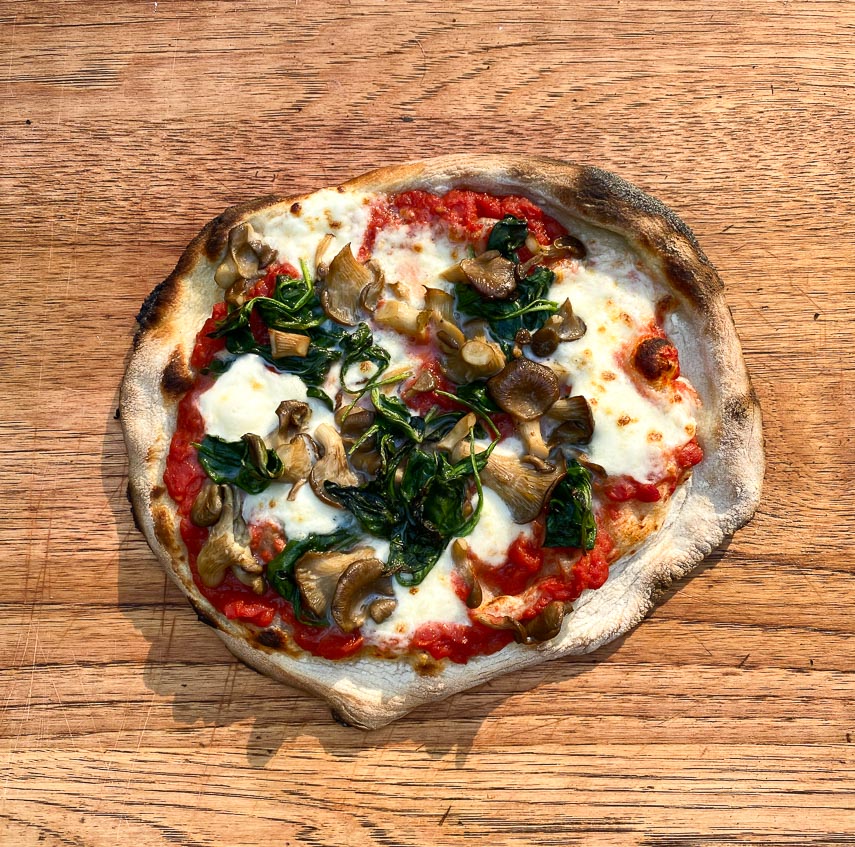
· Spinach & Oyster Mushroom Pizza
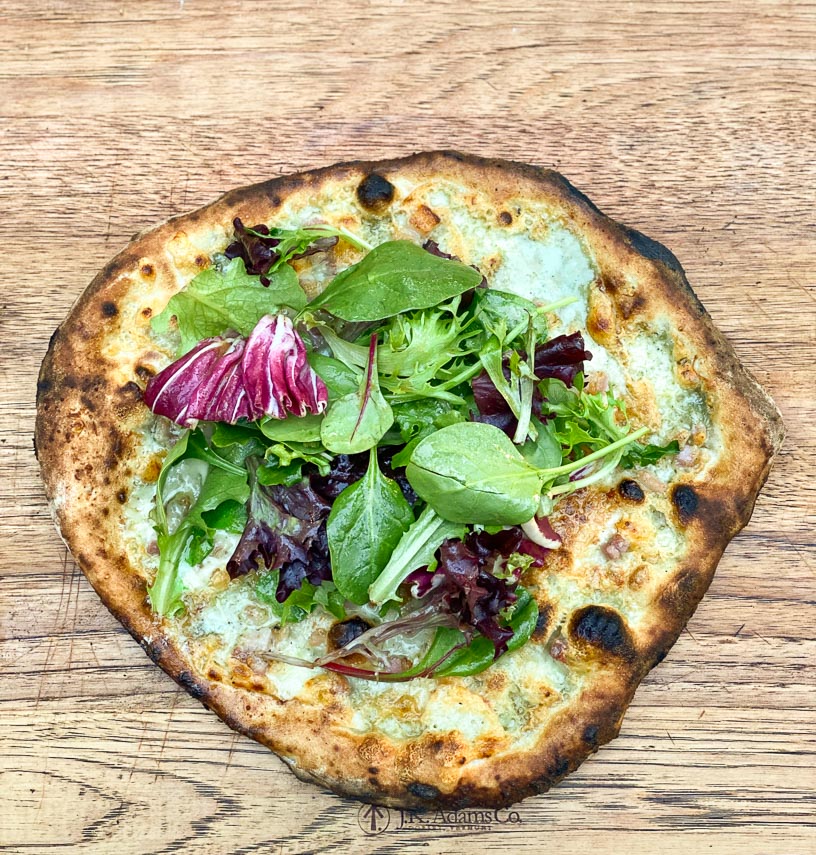
· White Pesto Salad Pizza
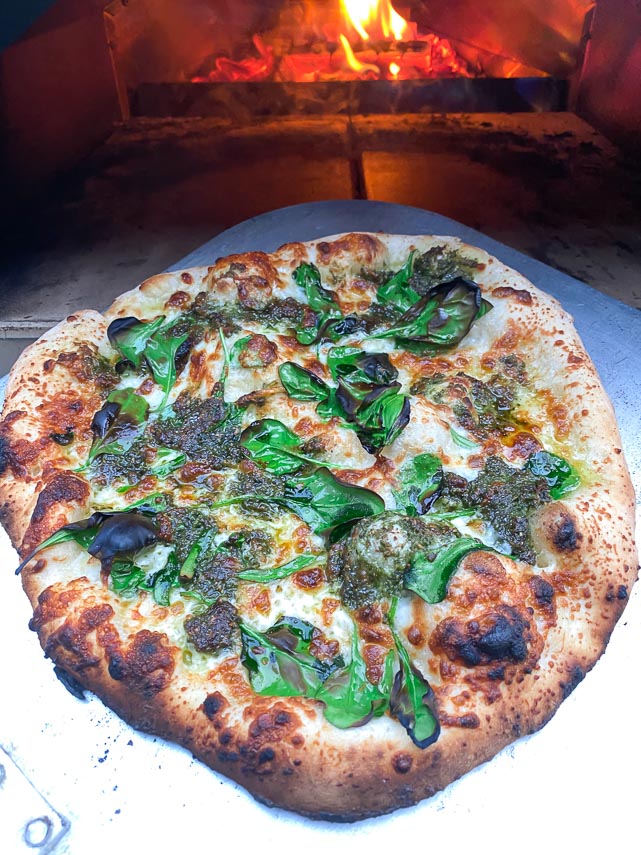
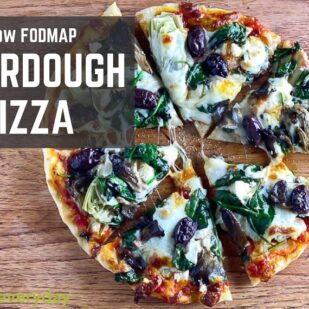
· Spinach Pesto Pizza – see it in all its glory below!
What will YOU make?
Troubleshooting Neapolitan-Style Pizza
According to Enzo Coccia, a well-respected Neapolitan pizza maker, there are 6 main things that can go wrong with a Neapolitan or Neapolitan-style pizza:
1. Dough Too Dry: The dough is not covered sufficiently during its rising/fermentation period. You will see dry, crusty patches upon patting out the dough; the toppings will not apply evenly, and the pizza will bake up with dry, crusty patches.
2. Dough Not Sufficiently Risen: The dough will be difficult to pat out; it will lack “digestibility” (his term); the pizza bakes up flat with very little rim and little to no airy qualities.
3. Dough Too Cold: Here the mistake is the dough being taken out of the refrigerator and immediately worked by the pizza maker, patted out, topped and baked; it will be difficult to work with. It will bake unevenly, showing undesirable black spots, referred to as “measles pizza” by many pizza chefs. (On the other hand, some black spots referred to as “leopard spots” are desirable; you will have to go live in Naples for a while to discern the difference).
4. Dough Collapses: What this means is that the dough has its own growth trajectory, its own strength and stability and if it goes beyond that, it collapses and “dies”. The gluten lattice will be weak. The baked pizza might rise around the edges, but you might see an under-done quality in the center of the pizza disc. The solution to this is to monitor your dough during fermentation next time. The dough might have become too warm at one point; you might consider adding a small amount of a high-protein bread flour; or you might ferment the dough for a briefer period of time.
5. Excess Moisture: This can happen by not using enough flour when making the dough or can also develop in a very moist atmosphere. You can try to salvage by loading up with flour during the forming stage, but in the oven it will most likely burn on the bottom.
6. Oven Temperature: If the temp is too low (lower than 806°F/430°C), you will have to bake the pizza for a longer time (such as 3 minutes), and it will lose moisture and become crisp. If the temp is too high, the pizza burns.
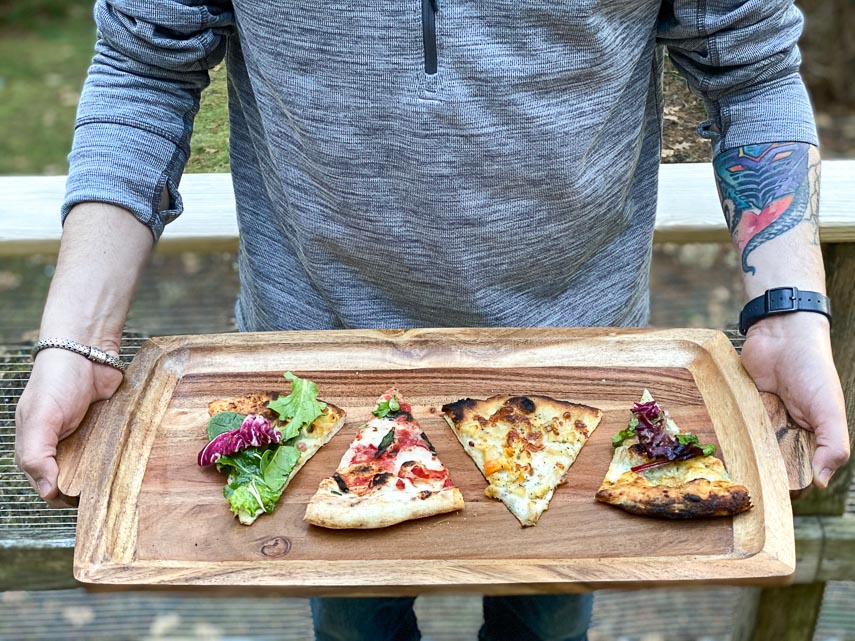
Let’s Make Neapolitan-Style Pizza!
There is nothing like seeing our pizza prep and cooking techniques! Check out the video below, but first a note on water and recipe technique.
Water to Flour Ratio
It is fascinating to watch pizzaiuoli make their dough. It is about beginning with water and adding flour to it – not vice versa. Water is an incredibly important ingredient in pizza dough and in Italy it takes center stage.
I have chosen to begin with the dry ingredients, but dissolve the salt in the water – a hybrid approach.
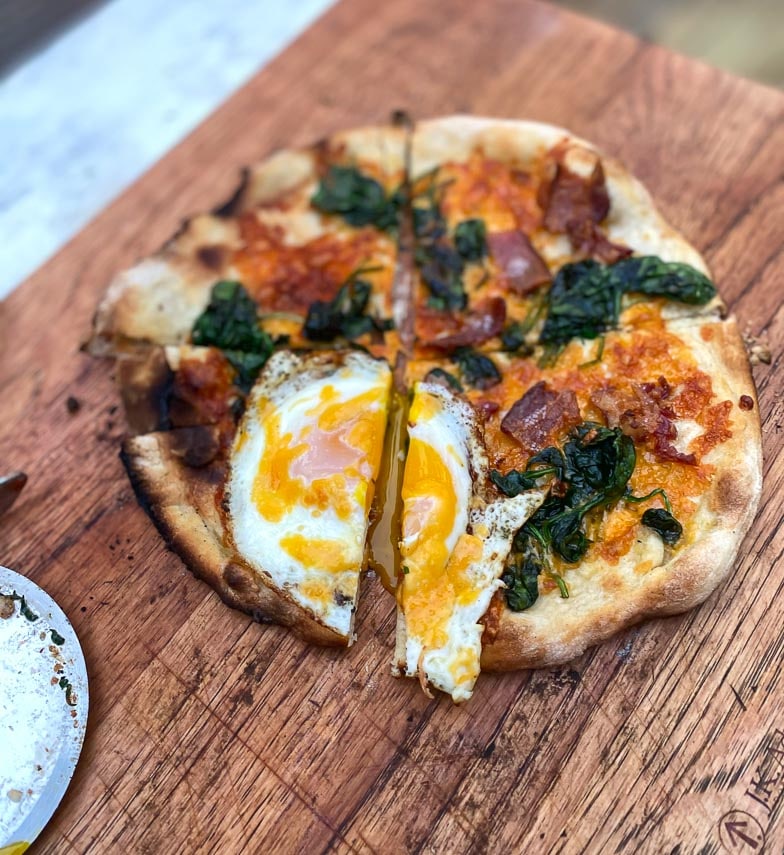
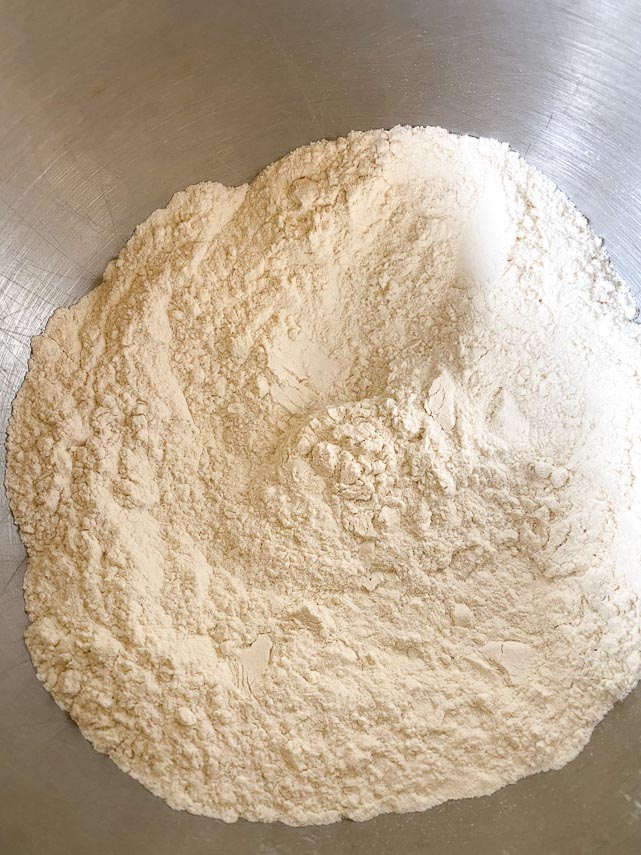
For Making By Hand: Whisk together the 17.6-ounces (500 g) of flour and instant yeast in a large bowl to aerate and combine. Dissolve salt in the warm water, slowly add to the dry mixture and begin to stir together with a sturdy wooden spoon until a wet dough forms, then beat vigorously until mixture looks like a firm, somewhat moist batter with a little elasticity.
For Making With A Stand Mixer: Place the 17.6-ounces (500 g) of flour and instant yeast in stand mixer bowl fitted with flat paddle or dough hook attachment and mix on low to aerate and combine.
Dissolve salt in the warm water.
Add salted water slowly to the dry mixture with machine on low-medium speed beating until a wet dough forms, then turn speed up to medium to medium-high and beat until mixture looks like a firm, somewhat moist batter with a little elasticity. At first it will look a bit shaggy. It isn’t finished mixing.
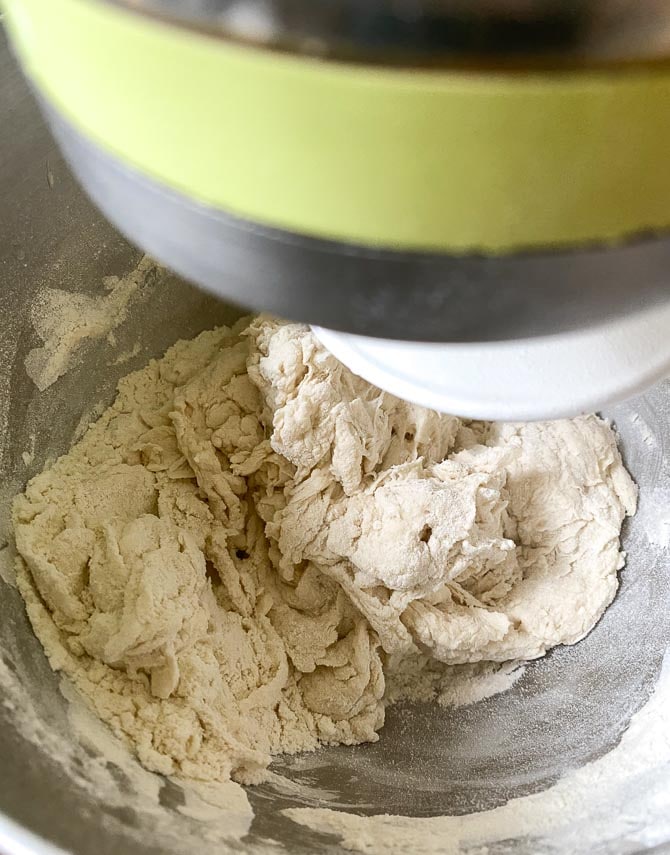
Keep beating until it is smooth.
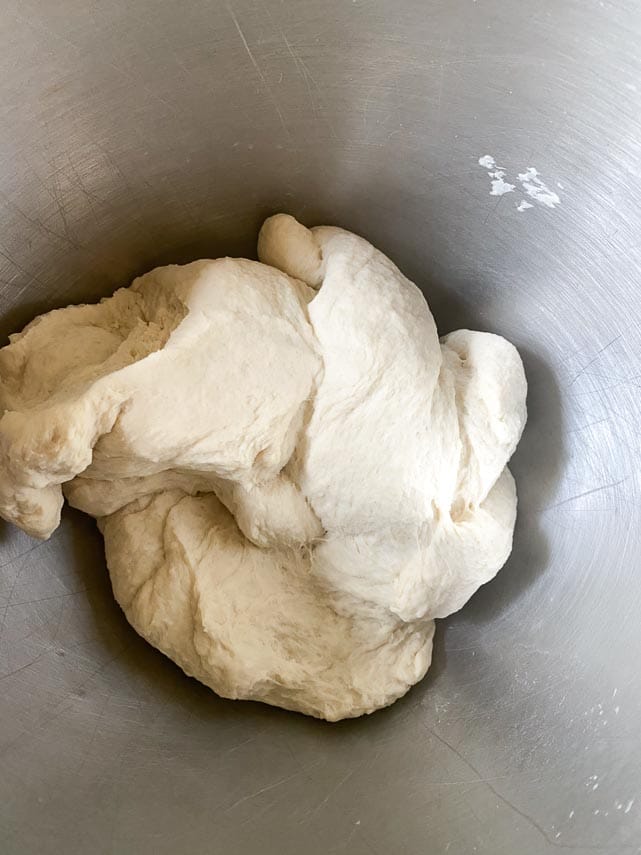
Very lightly coat a bowl or container with olive oil, scrape the dough into the receptacle and turn the dough around to coat with oil. Seal the bowl with plastic wrap, or snap on a cover to the container.
Let sit at warm room temperature for 2 hours then unmold onto work surface. Divide into four equal pieces.
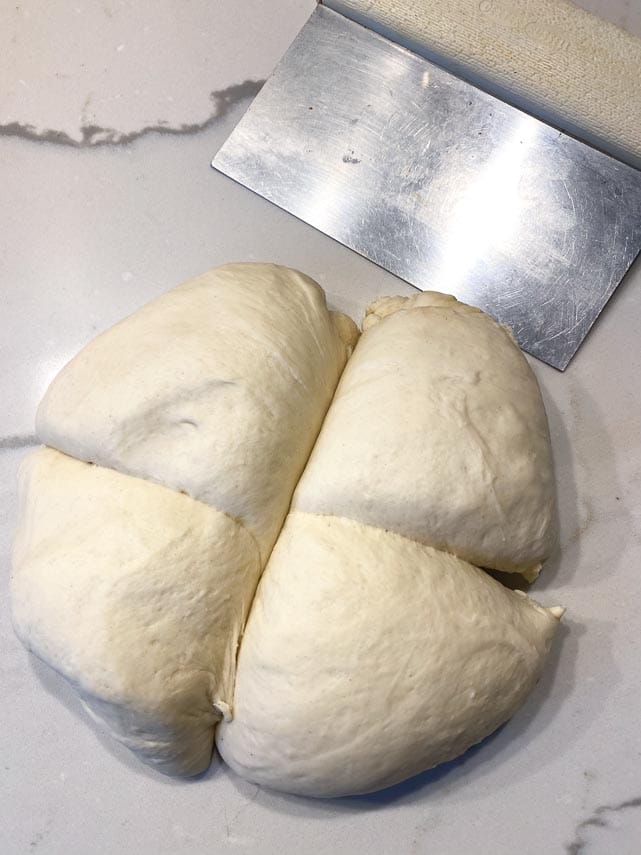
Round them off, creating smooth domed tops, tucking edges underneath.
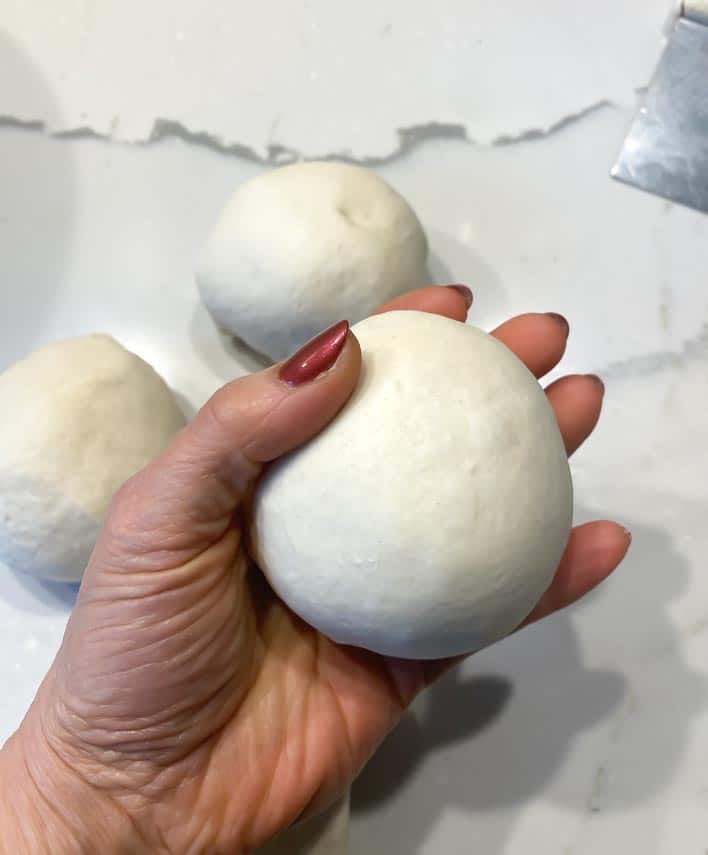
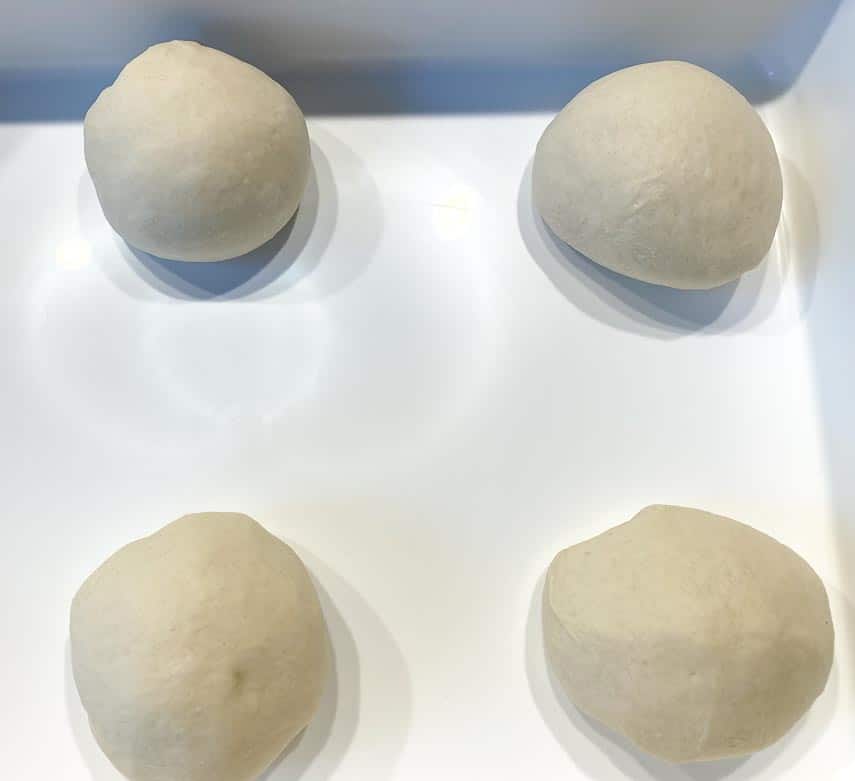
Place in individual container or one large container, either way allowing room for growth. Very lightly coat with oil, seal container (s) and refrigerate for 72-hours. Here they are ready for their 3-day rest.
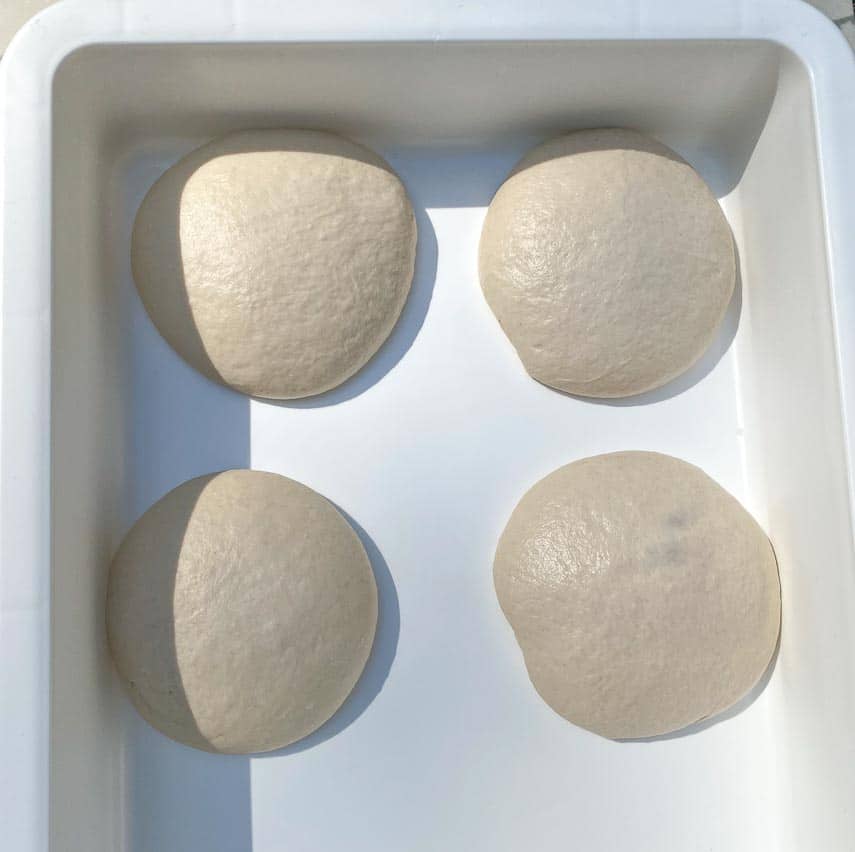
Remove from refrigerator at least 4 hours before cooking pizzas, leaving covered. Below you can see that they have relaxed and grown at the end of this time period.
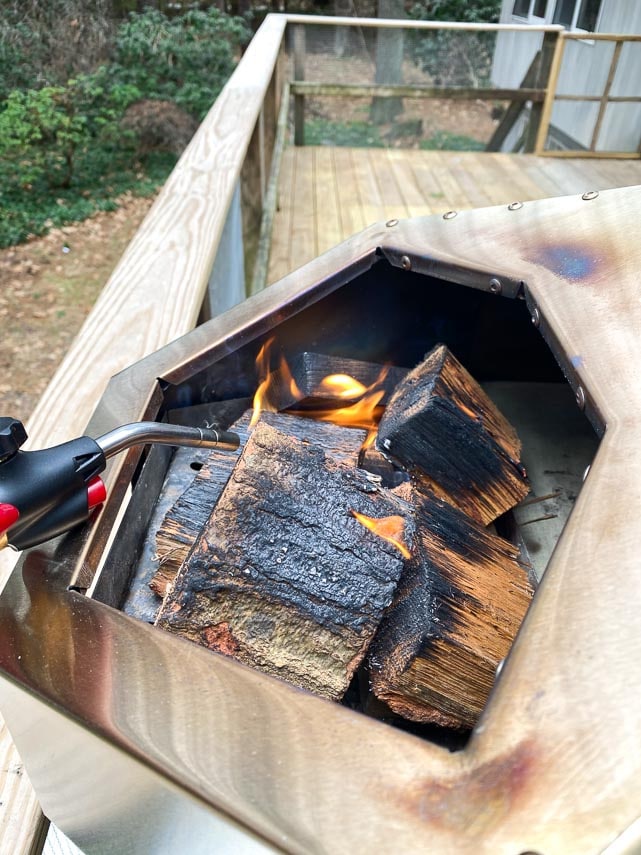
Get your wood fire going or light your oven according to manufacturer’s instructions.
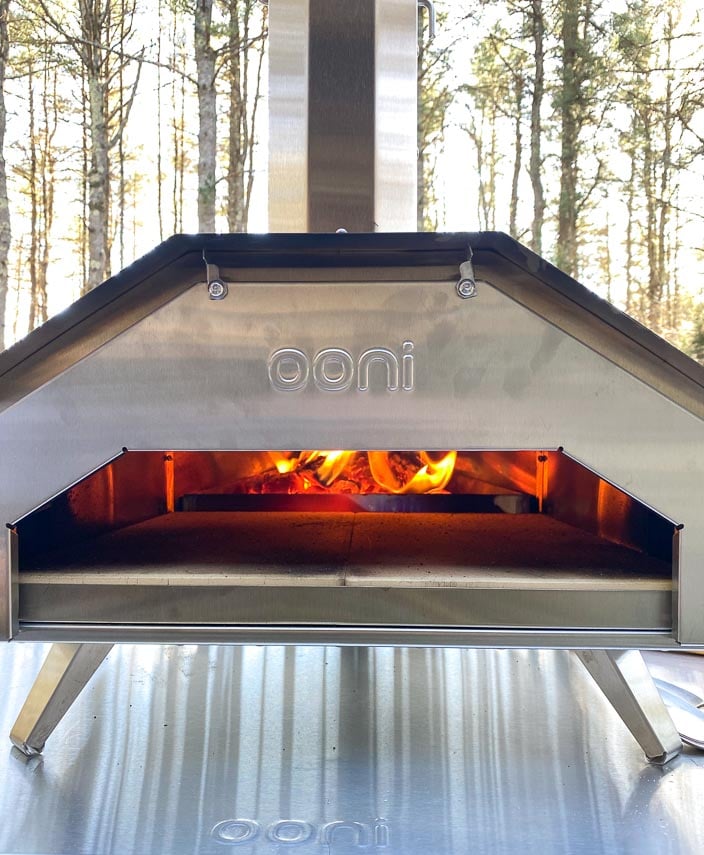
Below you can see our Ooni Pro with the pizza door attached. We took some of the photos with the door off for better visual access, but cook with it on for best results.
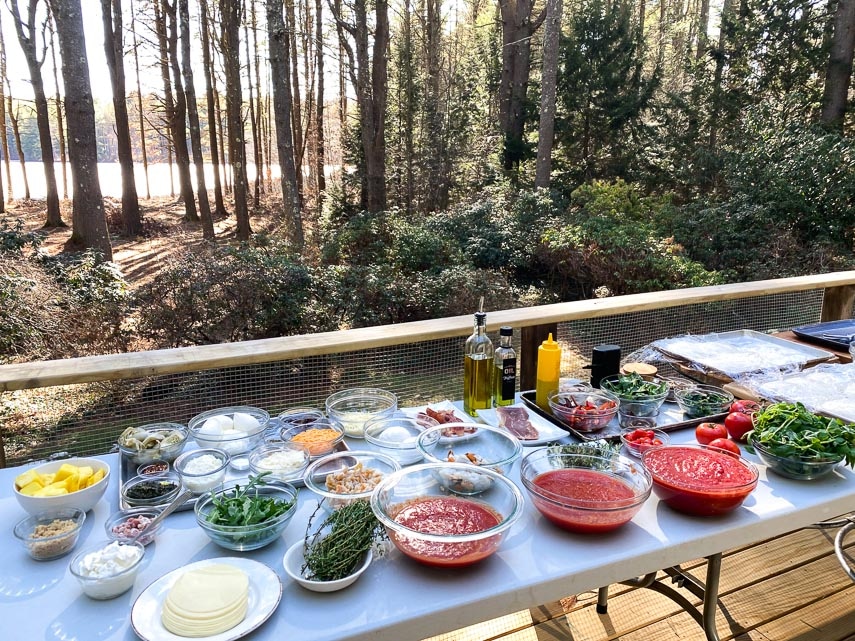
Have your toppings prepped. Here we were preparing for a party with about 40 pizzas!
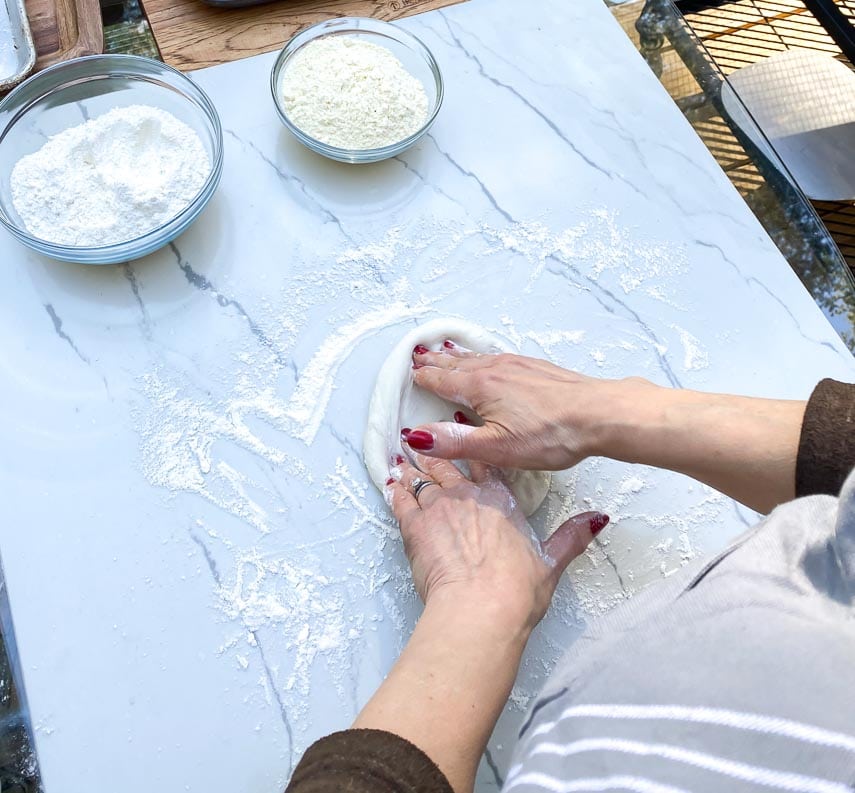
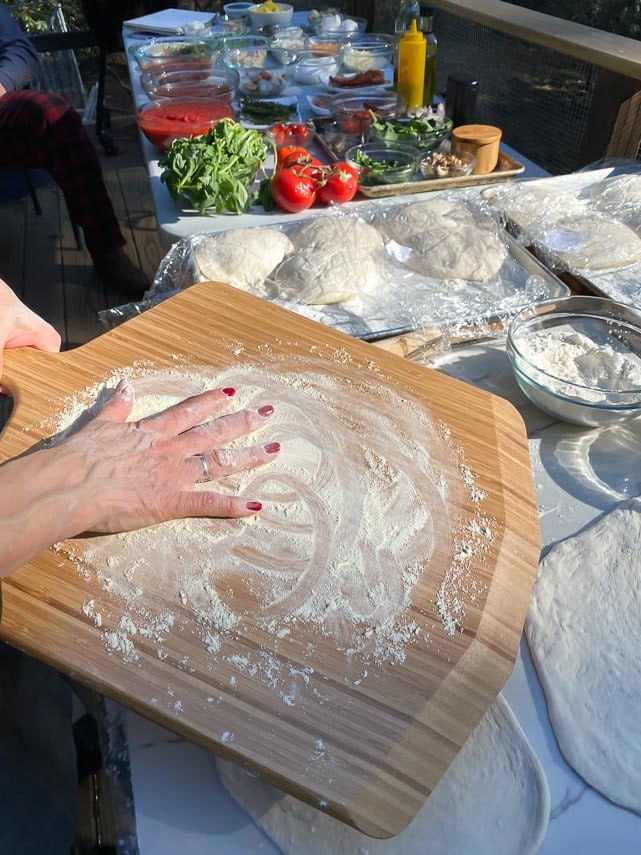
Lightly flour your work surface. Working with one ball of dough at a time (keeping others covered) start to pat out the dough using your fingertips.

You always want to be working from the middle going outwards and you want to preserve the edge – your cornicione. Do not flatten the edge.
Keep flattening and stretching until your dough is about 10-inch to 12-inches (25 cm to 30.5 cm) across. You should be able to do this with your hands; no rolling pin needed. I do a combo of pressing and stretching with the dough on my work surface and also picking it up in the air. Again, take care to preserve the rim and in this case allow the weight of the dough to stretch itself.
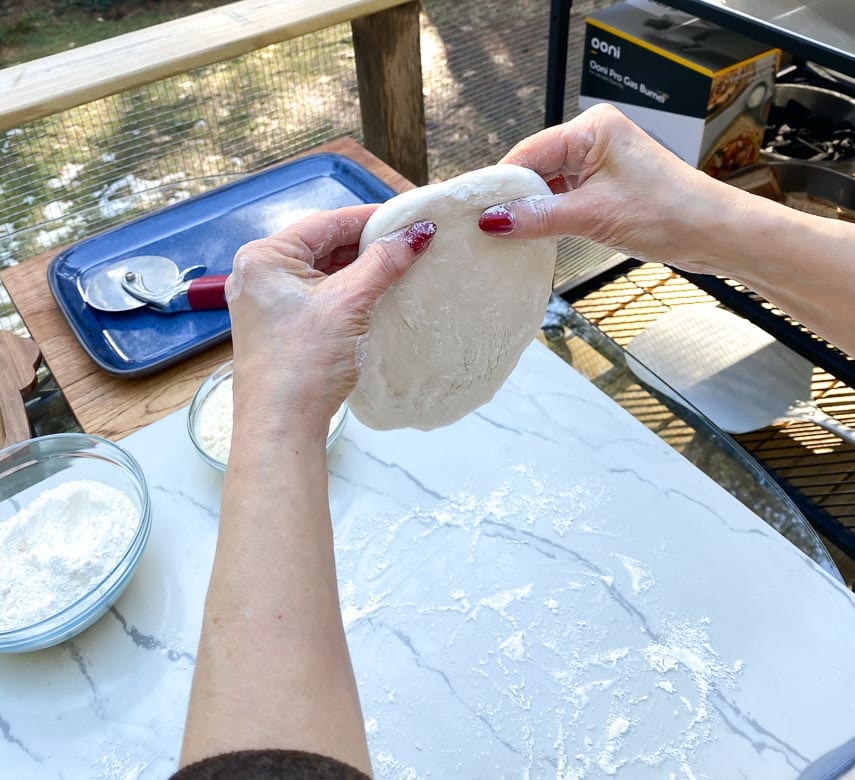
You will get the hang of it the more you make!
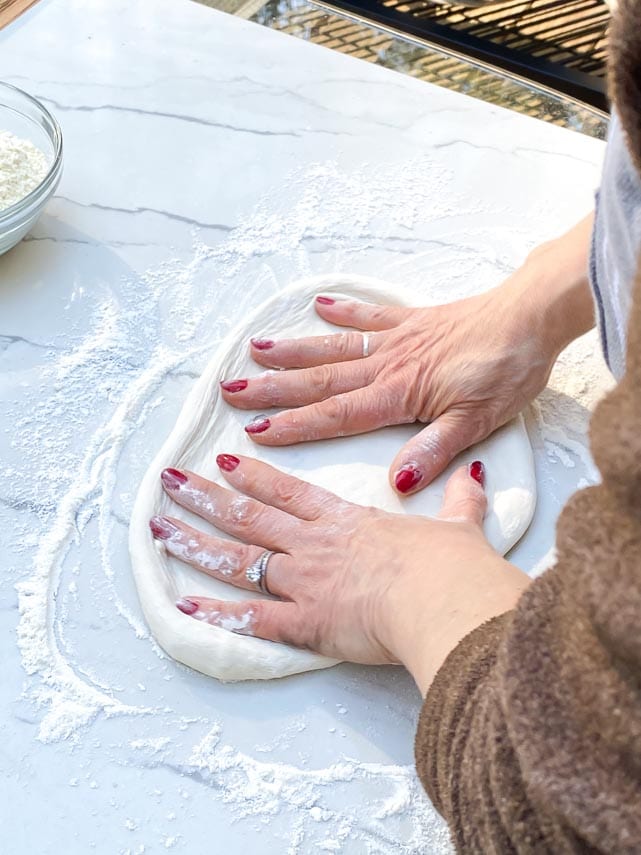
Scatter extra flour on your wooden peel. Now you have a choice. Top your pizza before you move it to the peel, or after. Many pros do it before; you might find it easier to do after. Either way when you do move the raw dough to the peel, take a moment to re-shape it and make it as pleasingly round as possible.
To top with Pizza Sauce, start with about ⅓ cup (75 ml) and starting in the center and moving outward begin spreading it with the bottom, rounded surface of a large spoon, leaving the edges of the crust bare. Scatter cheese on top. Add a few fresh basil leaves, a drizzle of olive oil.
Make sure the oven and deck are up to temperature with your infrared thermometer. I am aiming the red laser dot at the center of the oven deck.
It reads instantly.
Now it is time to launch your pizza into the oven!
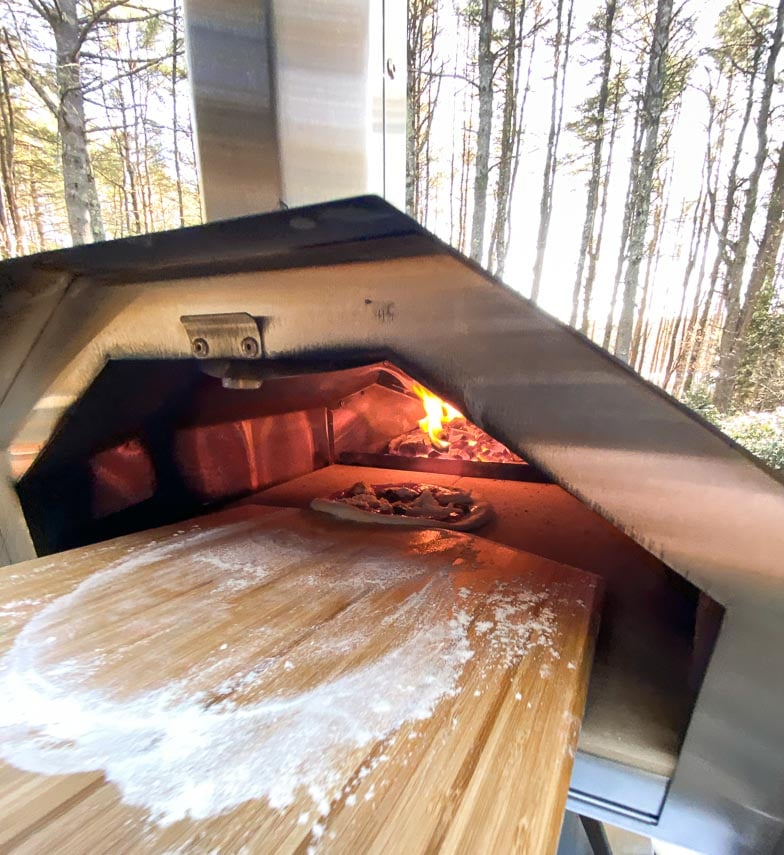
Have your turning peel handy. About 5 to 10 seconds after launch begin to slide the peel under the pizza to move it and turn it around. Monitor it constantly.
Do not try to pat out the next pizza at the same time!
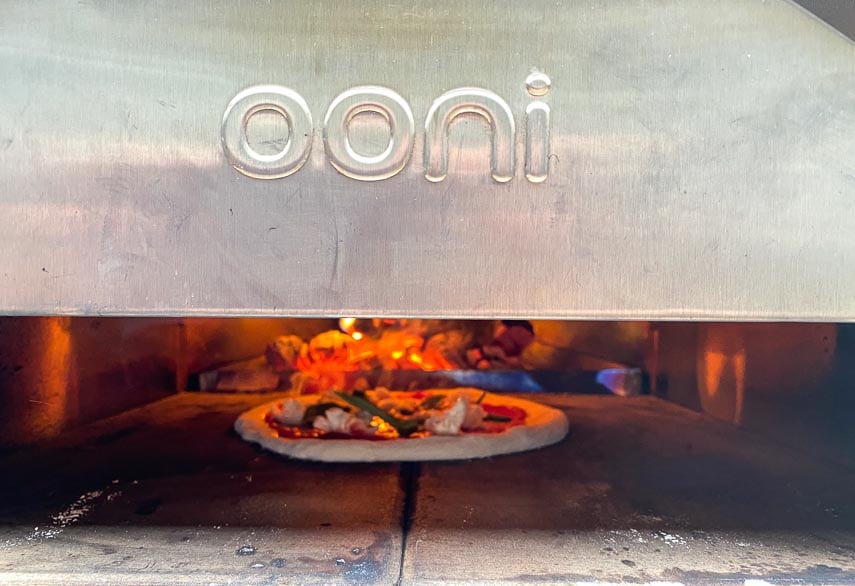
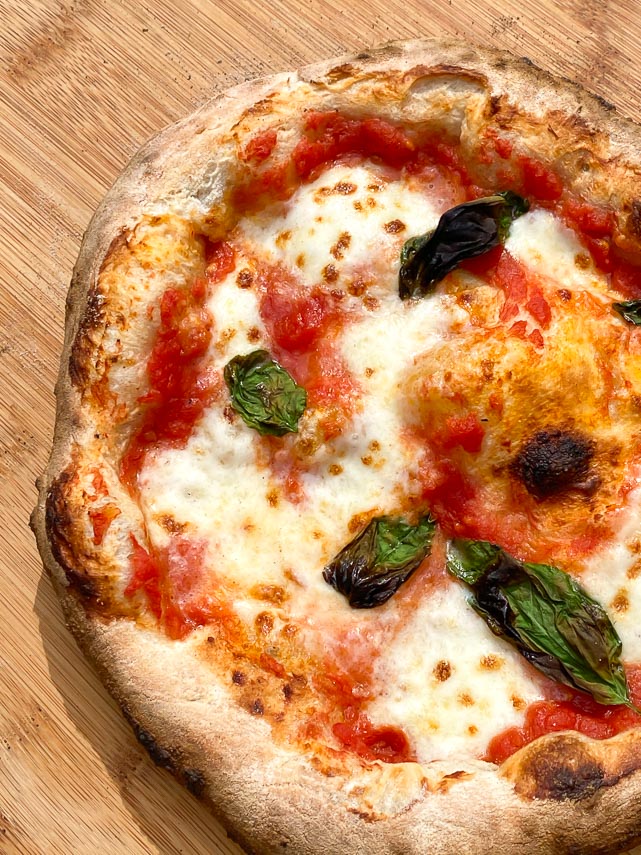
You want the pizza to be golden here and there, and spotted with some char here and there. The bottom should be cooked thoroughly, and the toppings should also be hot and cooked through. Total cooking time 60 to 90 seconds. We LOVE our Ooni ovens!
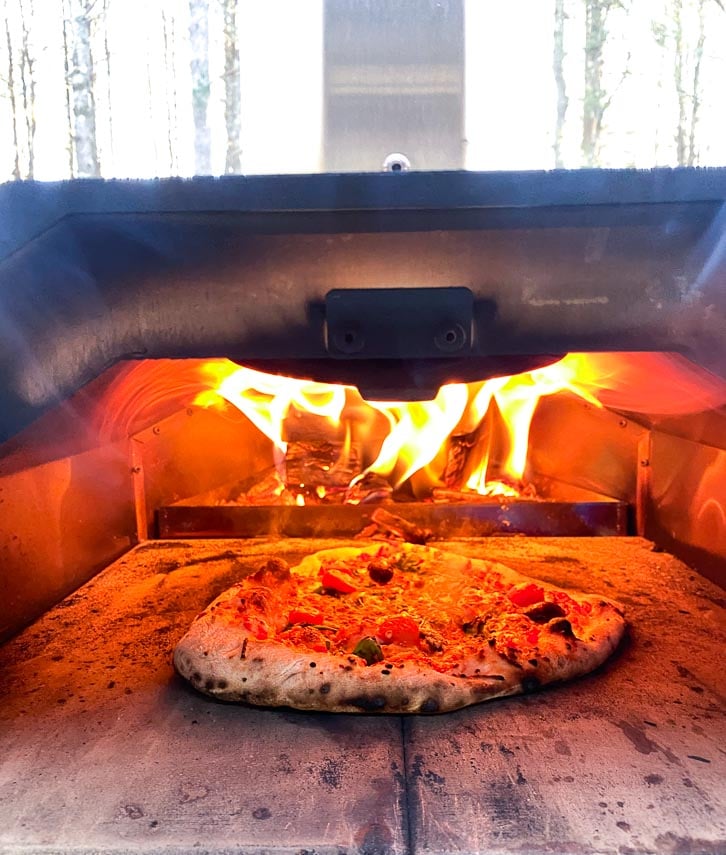
Serve immediately. Look at the cornicione!
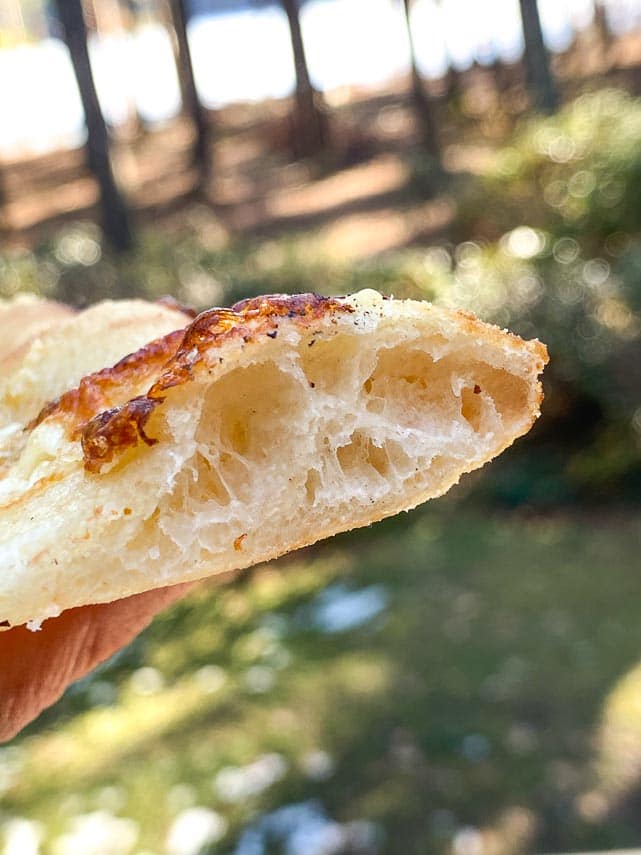
Repeat with remaining dough and toppings.
And most of all, HAVE FUN!

FODMAP Information
Our recipes are based on Monash University and FODMAP Friendly science.
- Canned Tomatoes: Monash University has lab tested canned tomatoes and they are low FODMAP at 92 g or 3.2-ounces, which they say is about ⅗ of a cup. Moderate FODMAPs kick in at about ¾ cup or 115 g, at which point fructose can become an issue.
- Cheese: Many cheeses have low FODMAP serving sizes. The low FODMAP diet is not a dairy-free diet. Hard cheeses such as Parmigiano Reggiano or Pecorino Romano have been lab tested by Monash University and are low FODMAP in 40 g amounts.
- Oil: All pure oils are fats and contain no carbohydrates, therefore they contain no FODMAPs.
- Sugar: Monash University and FODMAP Friendly have both lab tested white, granulated sugar. Monash states that a Green Light low FODMAP serving size of white sugar is ¼ cup (50 g). FODMAP Friendly simply states that they have tested 1 tablespoon and that it is low FODMAP. Regular granulated white sugar is sucrose, which is a disaccharide made up of equal parts glucoseand fructose. Sucrose is broken down and absorbed efficiently in the small intestine.
- Tomatoes: Both Monash University and FODMAP Friendly have lab tested common, beefsteak tomatoes. Monash University lab tests have shown no FODMAPs. FODMAP Friendly gives them a “Pass” at ½ cup (75 g) portions. Cherry tomatoes and Plum (Roma) tomatoes have also been tested by Monash and FODMAP Friendly. Both Monash and FODMAP Friendly recommend 75 g of cherry tomatoes as a serving (about 5 or ½ cup) and 75 g of plum or Roma tomatoes, which is about 1 small tomato or ½ cup.
- Yeast: Yeast – fresh, dry and instant – are all low FODMAP.
Please always refer to the Monash University & FODMAP Friendly smartphone apps for the most up-to-date lab tested information. As always, your tolerance is what counts; please eat accordingly. The ultimate goal of the low FODMAP diet is to eat as broadly as possible, without triggering symptoms, for the healthiest microbiome.
Wood-Fired Low FODMAP Neapolitan-Style Pizza
This Wood-Fired Low FODMAP Neapolitan-Style Pizza does require a wood-fired oven that reaches temperatures of at least 900°F (482°C) – I use an Ooni Pro – as well as very specific ingredients. I know that all of you don’t have a cooking source like this available, but for those who do, I wanted to bring you a version of a wood-fired low FODMAP pizza. This dough is based on a long, 3-day fermentation period, FYI, so you have to plan ahead. As with any recipe, read this through before starting.
Low FODMAP Serving Size Info: Makes 4 pizzas; approx. 8 servings depending on toppings; ½ pizza per serving
Ingredients:
Pizza Dough:
- 17.6- ounces (500 g) Caputo 00 Pizzeria Flour (blue bag), plus extra
- ¼ teaspoon instant dry yeast, such as SAF brand
- 1 2/3 cups (405 ml) warm water, 120°F to 125°F (48°C to 52°C)
- 2 teaspoon salt
Sauce & Toppings:
- 2 cups (480 ml) Low FODMAP Pizza Sauce
- 1- pound (445 g) fresh mozzarella in brine, drained and torn
- Fresh basil leaves
- Extra virgin olive oil
Preparation:
-
For Making By Hand: Whisk together the 17.6-ounces (500 g) of flour and instant yeast in a large bowl to aerate and combine. Dissolve salt in the warm water, slowly add to the dry mixture and begin to stir together with a sturdy wooden spoon until a wet dough forms, then beat vigorously until mixture looks like a firm, somewhat moist batter with a little elasticity.
-
For Making With A Stand Mixer: Place the 17.6-ounces (500 g) of flour and instant yeast in stand mixer bowl fitted with flat paddle or dough hook attachment and mix on low to aerate and combine. Dissolve salt in the warm water, slowly add to the dry mixture with machine on low-medium speed beating until a wet dough forms, then turn speed up to medium to medium-high and beat until mixture looks like a firm, somewhat moist batter with a little elasticity.
-
Very lightly coat a bowl or container with olive oil, scrape the dough into the receptacle and turn the dough around to coat with oil. Seal the bowl with plastic wrap, or snap on a cover to the container.
-
Let sit at warm room temperature for 2 hours then unmold onto work surface. Divide into four equal pieces, round them off, creating smooth domed tops, tucking edges underneath. Place in individual container or one large container, either way allowing room for growth. Very lightly coat with oil, seal container (s) and refrigerate for 72-hours.
-
Remove from refrigerator at least 4 hours before cooking pizzas, leaving covered.
-
Preheat oven according to manufacturer’s instructions to 900°F (482°C). The deck should be this hot. Have your toppings prepped.
-
Lightly flour your work surface. Working with one ball of dough at a time (keeping others covered) start to pat out the dough using your fingertips. You always want to be working from the middle going outwards and you want to preserve the edge – your cornicione. Do not flatten the edge. Keep flattening and stretching until your dough is about 10-inch to 12-inches (25 cm to 30.5 cm) across. You should be able to do this with your hands; no rolling pin needed.
-
Scatter extra flour on your wooden peel. Now you have a choice. Top your pizza before you move it to the peel, or after. Many pros do it before; you might find it easier to do after. Either way when you do move the raw dough to the peel, take a moment to re-shape it and make it as pleasingly round as possible.
-
To Top with Pizza Sauce, start with about ⅓ cup (75 ml). Starting in the center and moving outward begin spreading it with the bottom, rounded surface of a large spoon, leaving the edges of the crust bare. Scatter cheese on top. Add a few fresh basil leaves, a drizzle of olive oil, and launch into the oven.
-
Have your turning peel handy and about 5 to 10 seconds after launch begin to slide the peel under the pizza and begin to move it around and turn it around. Monitor it constantly. Do not try to pat out the next pizza at the same time!
-
You want the pizza to be golden here and there, spotted with some char here and there. The bottom should be cooked thoroughly, and the toppings should also be hot and cooked through. Total cooking time 60 to 90 seconds.
-
Serve immediately and repeat with remaining dough and toppings.
Notes:
FODMAP Information
Our recipes are based on Monash University and FODMAP Friendly science.
• Canned Tomatoes: Monash University has lab tested canned tomatoes and they are low FODMAP at 92 g or 3.2-ounces, which they say is about ⅗ of a cup. Moderate FODMAPs kick in at about ¾ cup or 115 g, at which point fructose can become an issue.
• Cheese: Many cheeses have low FODMAP serving sizes. The low FODMAP diet is not a dairy-free diet. Hard cheeses such as Parmigiano Reggiano or Pecorino Romano have been lab tested by Monash University and are low FODMAP in 40 g amounts.
• Oil: All pure oils are fats and contain no carbohydrates, therefore they contain no FODMAPs.
• Yeast: Yeast – fresh, dry and instant – are all low FODMAP.
Please always refer to the Monash University & FODMAP Friendly smartphone apps for the most up-to-date lab tested information. As always, your tolerance is what counts; please eat accordingly. The ultimate goal of the low FODMAP diet is to eat as broadly as possible, without triggering symptoms, for the healthiest microbiome.
Nutrition
All nutritional information is based on third-party calculations and should be considered estimates. Actual nutritional content will vary with brands used, measuring methods, portion sizes and more. For a more detailed explanation, please read our article Understanding The Nutrition Panel Within Our Recipes.



Great article.. its very informative for me thanks for sharing
Thank you Olivia! This was truly a labor of love and I hope more FODMAPers and their families will be able to enjoy PIZZA!