
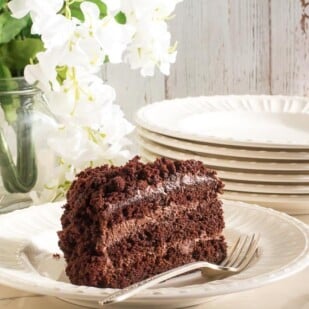
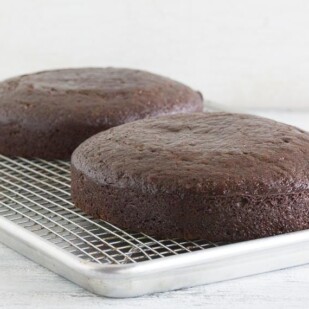
If you are looking for a very chocolaty experience in cake form, that happens to be easy to make, this Low FODMAP Blackout Cake is the perfect choice. Make this cake for Father’s Day, Mother’s Day, Birthdays – or anytime you want a knockout chocolate cake. No one will even imagine that this is gluten-free and lactose-free and LOFO! You don’t even have to mention it.

This Blackout Cake Is Historic
The visual of this cake, with its shaggy coating of dark cake crumbs, harkens back to Ebinger’s Blackout Cake, beloved in the New York area. The bakery closed its doors in the early 1970s and the original recipe was never published; my version uses “black” cocoa, which is a specialty product that you can order online. (I have never seen it in stores, except for the King Arthur Flour store in VT).

Black cocoa has the color and flavor of the cocoa in Oreo cookies, and when combined with natural cocoa in this recipe, it gives the cake an extra-deep chocolaty boost. You could use 2/3 cup natural cocoa total if you like; the cake will not be as dark in color or rich in flavor, but it will work.
Now would be a great time to read our article, All About Cocoa.

The “Frosting” Is Pudding!

The filling and frosting for our Low FODMAP Blackout Cake version is actually a rich pudding. The original cake used pudding as well as a component. Use the cocoas and chocolates suggested below in the ingredients for best results (like the black cocoa). The pudding component is best made a day ahead so that it can chill and become firm enough to fill and frost the cake.
By the way, this impressive-looking Blackout Cake is very easy to make and I consider it to be one of my most reliable party cakes. Everyone loves a rich chocolate cake and it is so moist that it keeps well for a few days in the fridge. Don’t tell anyone how easy it is; people will think you slaved over it.

Let’s Talk Dairy
There is a fair amount of dairy in this Low FODMAP Blackout Cake. As you know, the low FODMAP diet is not a dairy-free diet, but it is lowered in lactose. Finding lactose-free whole milk is easy. Finding lactose-free heavy cream might not be.
Two points to consider: You can refer to our DIY Lactose-free Dairy article to make your own, or just adhere to our serving sizes and you will be OK.

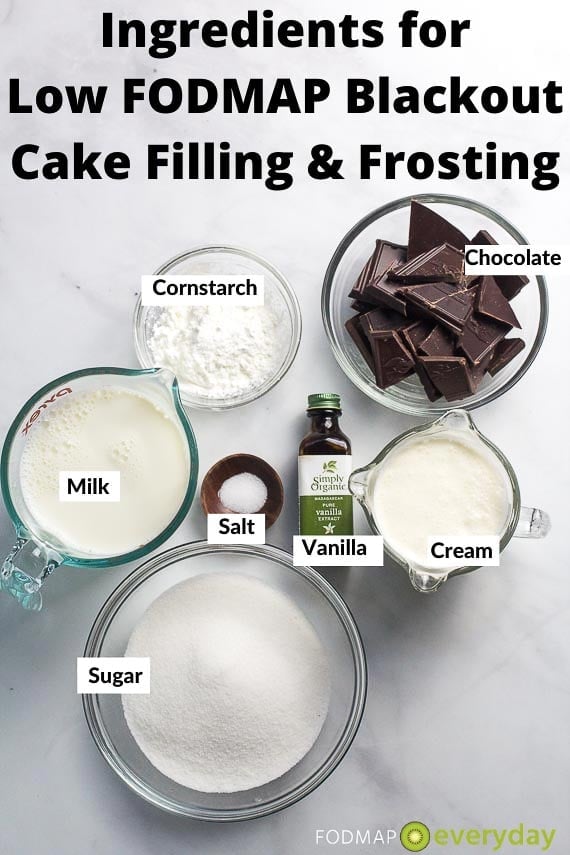
Ingredients For Low FODMAP Blackout Cake Filling & Frosting
This recipe has two components: the cake and the filling/frosting. First up, the filling and frosting ingredients. It has to chill overnight, so make the pudding/frosting first!
It is easy to whip up, too.
Ingredients For Low FODMAP Blackout Cake
The ingredients for the cake are fairly standard, except for the black cocoa, which you might have to order ahead, so plan accordingly.

Low FODMAP Blackout Cake Assembly
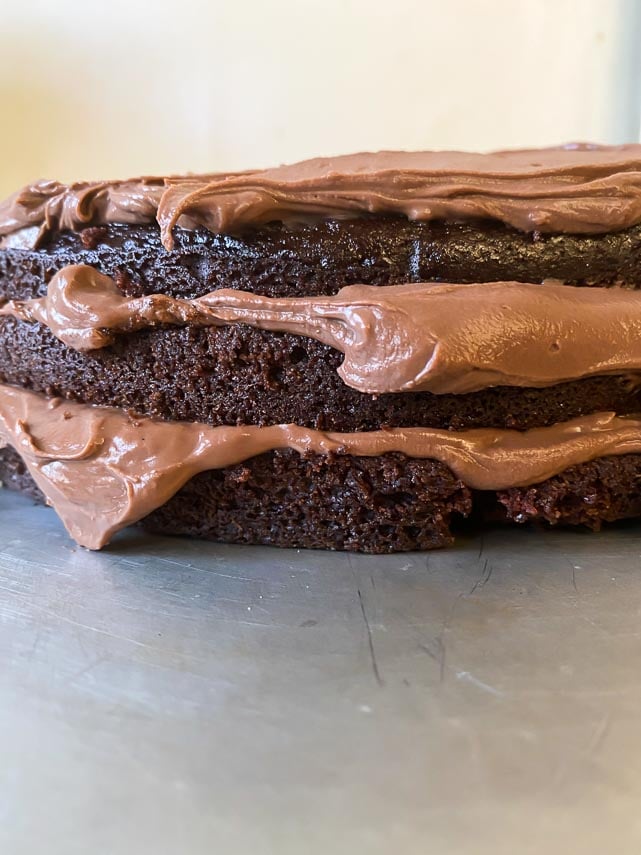
Let’s walk through assembling the cooled cake layers and filling and frosting them with chilled, firm pudding.
Your pudding should be made the day before, to chill overnight in the fridge. Cake layers should be cooled and each one of them divided in half horizontally.
Then, crumble one of the layers with your fingertips and place in a below, as shown below. Set aside for later.

Save this article
Then, use the chilled pudding to “frost” the layers. Glide your icing spatula over the pudding; don’t let it contact the cake or you will bring crumbs up into the frosting.
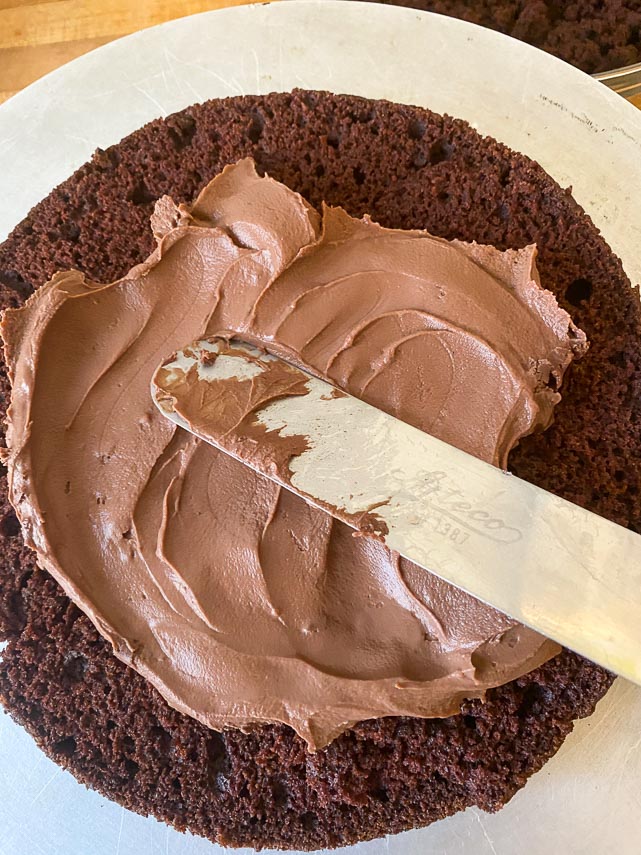
Allow the pudding to ooze out of the sides as seen below. You will use this excess to “frost” the sides of the cake in the next step.
Then, coat the entire cake, top and sides, with pudding.

Time to grab the cake crumbs that you put aside. Cover the entire cake with crumbs from that first layer that you crumbled and reserved. Below you can see that there are still a few spots that need some cake crumbs attached. The luscious pudding is peeking through!

You can see above that I used my cake decorating turntable to facilitate the process. If you have one, use it!
If you are looking for a super simple chocolate experience, be sure to check out our Low FODMAP Chocolate Pudding Cake!
Now, let’s make a Blackout Cake together!
Low FODMAP Blackout Cake
If you are looking for a very chocolaty experience in cake form, that happens to be easy to make, this Low FODMAP Blackout Cake is the perfect choice. Moist cake with a rich pudding that you use for the filling and the frosting.
Ingredients:
Pudding:
- ¼ cup (28 g) sifted cornstarch
- 2 cups (480 ml) lactose-free whole milk
- 1 cup (240 ml) lactose-free heavy cream
- 1¼ cups (248 g) sugar
- 6- ounces (170 g) unsweetened chocolate, finely chopped
- ¼ teaspoon salt
- 1½ teaspoons vanilla extract
Cake:
- 3 cups (435 g) low FODMAP, gluten-free all-purpose flour, such as Bob’s Red Mill 1 to 1 Gluten Free Baking Flour
- 2 cups (396 g) sugar
- ⅓ cup (28 g) sifted black cocoa
- ⅓ cup (28 g) sifted natural cocoa (not Dutch-processed)
- 1 tablespoon instant espresso powder, such as Medaglia d’Oro
- 2 teaspoons baking soda
- 1 teaspoon salt
- 2 cups (480 ml) warm water
- ⅔ cup (165 ml) neutral vegetable oil, such as canola or sunflower
- 2 tablespoons apple cider vinegar
- 1 tablespoon vanilla extract
Preparation:
-
For the Pudding: Place the cornstarch in a medium-sized saucepan. In a large measuring cup, combine the milk and cream. Drizzle a few tablespoons of the milk-cream mixture over the cornstarch and whisk until smooth. Pour the remaining milk-cream into the pan, then add sugar, chocolate, and salt. Cook over medium-low heat, whisking often, until the chocolate melts, then watch carefully as you bring it to a gentle boil. Whisk often as it thickens and takes on a pudding-like consistency; it should gently simmer for about 2 to 3 minutes. The pudding should be thick and glossy and leave whisk marks on top.
-
Remove from the heat and whisk in the vanilla. Scrape into an airtight container; cool to warm room temperature. Press plastic wrap directly onto the surface, snap on the lid, and refrigerate for at least 6 hours or preferably overnight.
-
For the Cake: Position a rack in the middle of the oven. Preheat the oven to 350° F (180°C).
-
Coat two 8-inch by 2-inch (20 cm by 5 cm) round cake pans with nonstick spray, line the bottoms with parchment rounds, and then spray the parchment.
-
Whisk together the flour, sugar, both cocoas, espresso powder, baking soda, and salt in a large bowl to aerate and combine. Whisk together the water, oil, vinegar, and vanilla in a medium bowl. Pour the wet ingredients over the dry mixture and whisk well until combined and very smooth. Divide the batter evenly between the two pans. Firmly tap the bottom of the pans on the work surface to dislodge any bubbles.
-
Bake for 30 to 35 minutes, or until a toothpick inserted in the center shows a few moist crumbs when removed. Cool cakes in the pans on racks for about 10 minutes. Unmold, peel off the parchment, and place directly on the racks to cool completely. Trim the layers to be level, if necessary, reserving the scraps. The layers are ready to use. Alternatively, place the layers on same size cardboard rounds and double wrap in plastic wrap; store at room temperature and assemble within 24 hours.
-
For the Assembly: Have all the components ready to use. Slice both cake layers evenly in half horizontally. Three layers will be used to assemble the cake. The fourth should be crumbled by hand into a bowl along with any scraps; this will be used for the exterior of the cake. Place one cake layer on a serving plate, bottom side down. Cover with a thick layer of pudding, top with the second cake layer and another layer of pudding. Top with the third cake layer, bottom side up. Cover the top and sides generously with pudding, which will be thick enough to stick to the cake. Use your fingers and palms to completely cover the cake top and sides with cake crumbs, pressing them into the pudding to adhere. Refrigerate for at least 2 hours and up to 2 days before serving slightly chilled.
Notes:
Tips
- Most cakes dry out in the fridge; the blackout cake doesn’t since it is filled and frosted with the pudding, which makes it a great do-ahead dessert for a birthday party or other celebration.
- This is one of those cakes that looks impressive but is actually very easy. It’s always good to have that kind of cake in your repertoire.
FODMAP Information
Our recipes are based on Monash University and FODMAP Friendly science.
- Chocolate: Monash University has lab tested dark, milk and white chocolate all have low FODMAP amounts: 85% dark at 20 g; dark at 30 g; milk at 20 g; white at 25 g.
- Oil: All pure oils are fats and contain no carbohydrates, therefore they contain no FODMAPs.
- Sugar: Monash University and FODMAP Friendly have both lab tested white, granulated sugar. Monash states that a Green Light low FODMAP serving size of white sugar is ¼ cup (50 g). FODMAP Friendly simply states that they have tested 1 tablespoon and that it is low FODMAP. Regular granulated white sugar is sucrose, which is a disaccharide made up of equal parts glucose and fructose. Sucrose is broken down and absorbed efficiently in the small intestine.
Please always refer to the Monash University & FODMAP Friendly smartphone apps for the most up-to-date lab tested information. As always, your tolerance is what counts; please eat accordingly. The ultimate goal of the low FODMAP diet is to eat as broadly as possible, without triggering symptoms, for the healthiest microbiome.
Nutrition
All nutritional information is based on third-party calculations and should be considered estimates. Actual nutritional content will vary with brands used, measuring methods, portion sizes and more. For a more detailed explanation, please read our article Understanding The Nutrition Panel Within Our Recipes.


Actually, Hershey’s makes a Special Dark cocoa which you can find in most grocery stores. It must be the same as the black cocoa used in this recipe because it tastes like Oreos. I’ve used it in baking many times and it works well.
Hi there! I am familiar with that cocoa and it is not the same as the black Cocoa. It does not have the same color or taste.
You could rename this “How to get Diabetes cake!” 40 g of sugar and only 2 g fiber? That’s ridiculously unhealthy. You state “White sugar is sucrose, which is a disaccharide made up of equal parts glucose and fructose. Sucrose is broken down and absorbed efficiently in the small intestine.” Correct, the “absorbed efficiently in your small intestine” means without a good amount of fiber, protein and/or healthy fat, that sucrose is going to spike your blood sugar way up to unhealthy levels. I suggest Monash U. also lists the impact sucrose has on your blood glucose too. Or better yet, change the recipe so that it’s healthier.
Hi Tom, I do hope I can convince you to change the 1 star rating. This cake is “advertised” as low FODMAP, and it is. And it happens to also be gluten-free, for those looking for that. From the beginning of our launch, we made a decision not to concentrate on low sugar, low fat, high fiber or anything other than low FODMAP. That is because, as you know, focusing on that alone can be daunting, and we want to be the very best we can be in that regard. In addition, the diet is meant to be undertaken along with a dietitian. About 36% of us have concurrent dietary and/or digestive issues. One person might be diabetic; another might have high cholesterol. Folks might need to lose weight, or another needs to monitor sodium levels. These are not our purview, but are of the dietitian. We cannot please everyone – but we do our very best to please the FODMAPer. Also, being a rich chocolate cake, we look at recipes like this as special occasions. Every day someone has a birthday, for instance. We believe treats such as this do have a place in our world. We like to focus on what we can have, and trust that our community will use their good judgement – and not have cake every day:)
So even though Tom seems to have issues with this cake, we love it in our family. My husband is pre-diabetic BTW and knows that this is not a healthy choice for him. The good news is that he doesn’t partake and we all live happily ever after.
Anywho, this is a special treat for us and one my son requests often. We get our cocoa from King Arthur. Now I have to be honest, my son can’t have dairy due to a medical condition so I do sub. I am able to use humble rice milk with a few tricks to thicken it pre cooking. I know it changes the recipe, but it is still magnificent. I may or may not be eating a piece of it while I am typing this.
Amy! Amazing feedback thank you and your swaps will help others:) Your last sentence cracked me up!